Sunday 31 August 2014

Remember This

Hello and welcome back. Today I am sharing something that has been on my to do list for a very long time!! Everyone who knows me well knows that I looooooooove chipboard. So when I received a parcel packed with chipboard goodies from the lovely Sally at Memory Maze I was......lets just say more than estatic!!!!

 Did I mention how much I love chipboard.

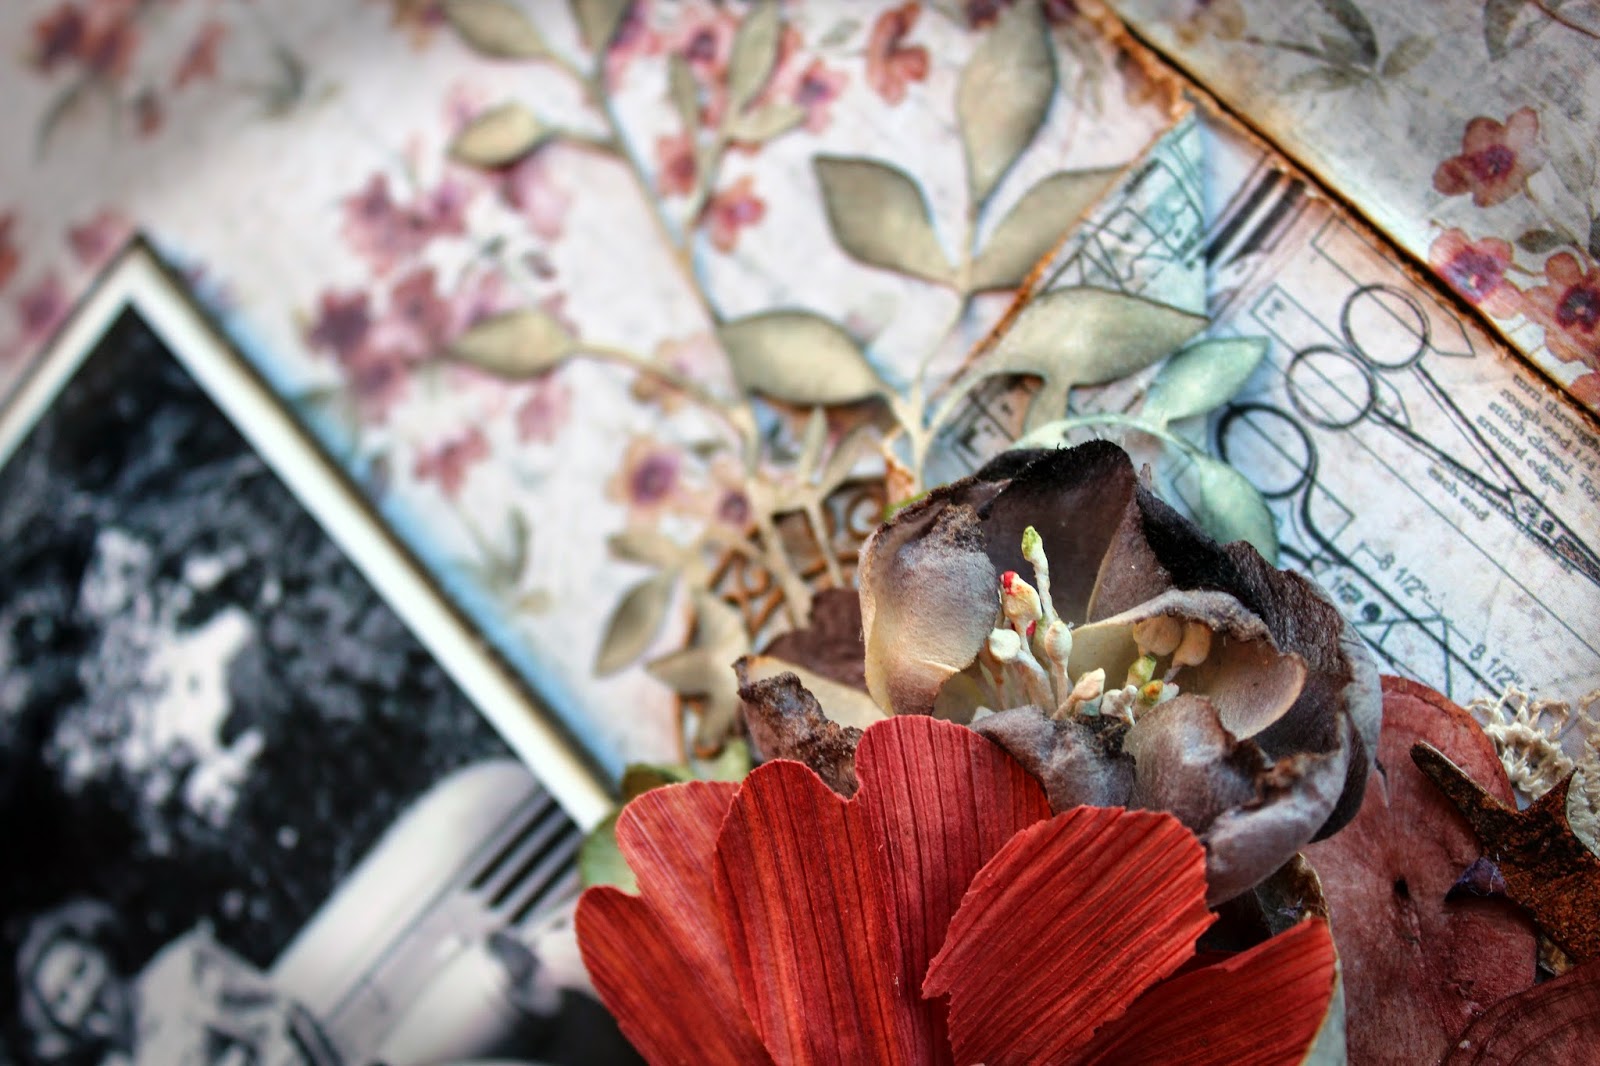
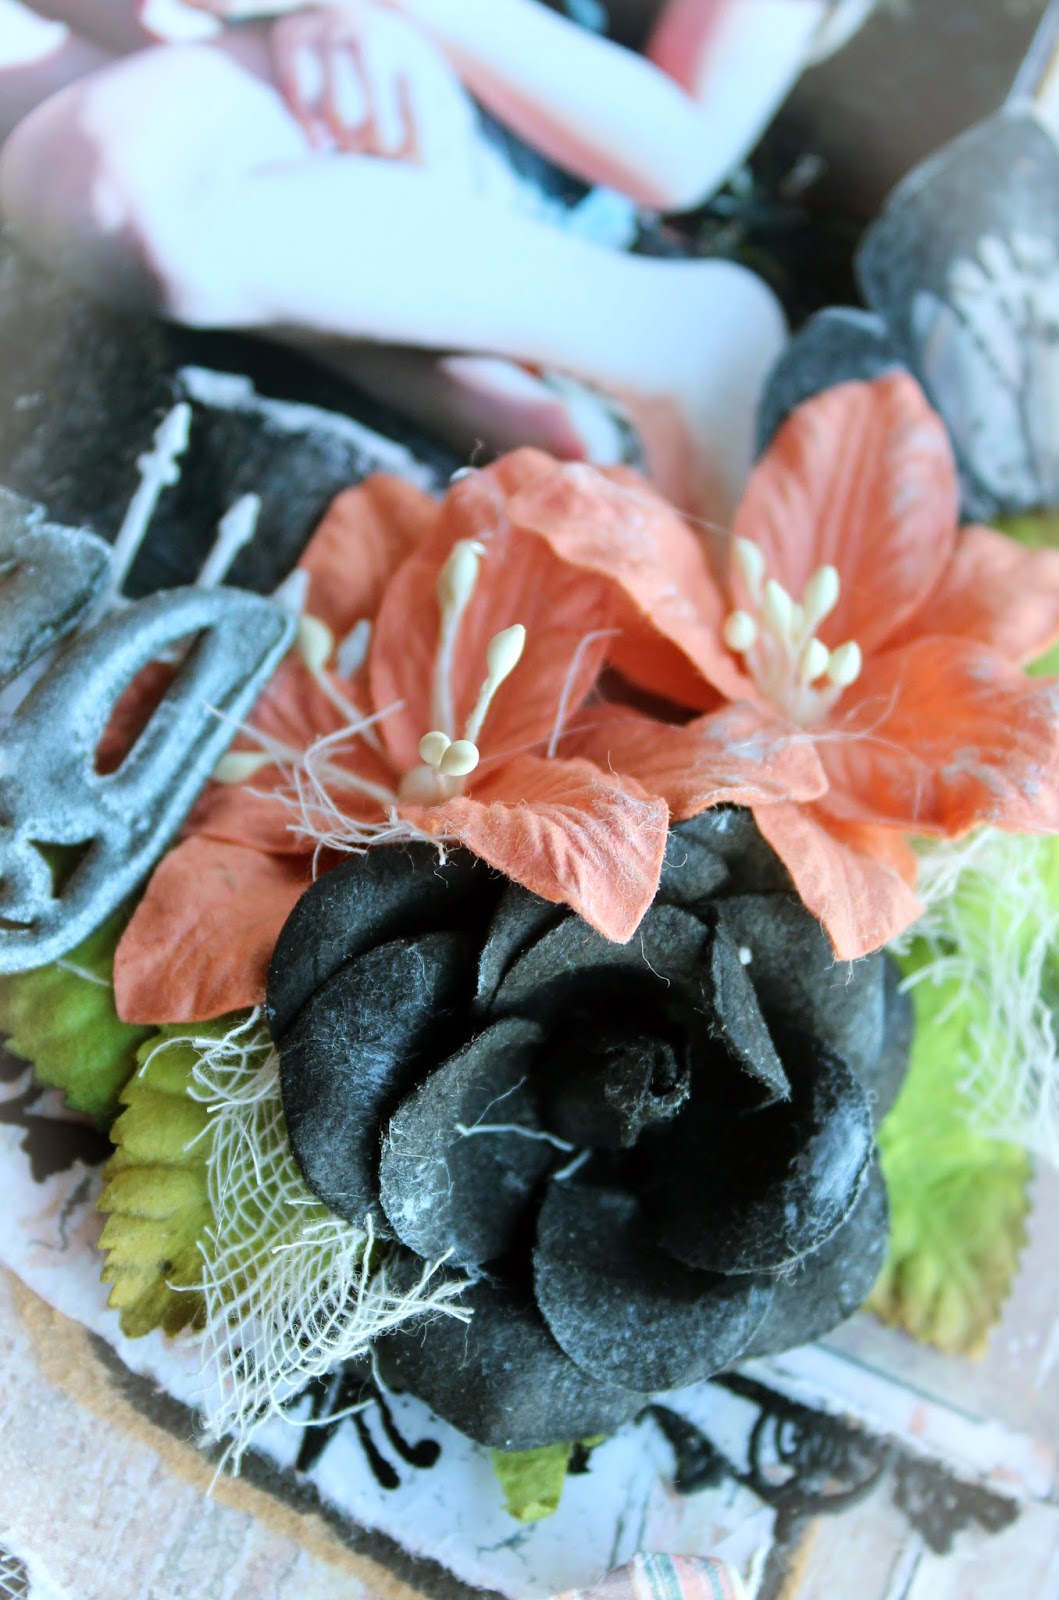
I have created a layout using my go to favourites. If you look closely at my creations you will always find a little something of Sally's beautiful chippies. Even if it is the tiny little hearts which you will also find on this layout too. I have incorporated Pion's newest range of papers called "My Precious Daughter".....and the photo is of my precious daughter Cydne at stage in her little life that was so very innocent to say the least. Sometimes a single glance from her would let you know exactly how she was feeling and this is one of those glances snapped up by the camera.
I have included some close ups and a materials list for you. Without further ado......

"Remember this"......


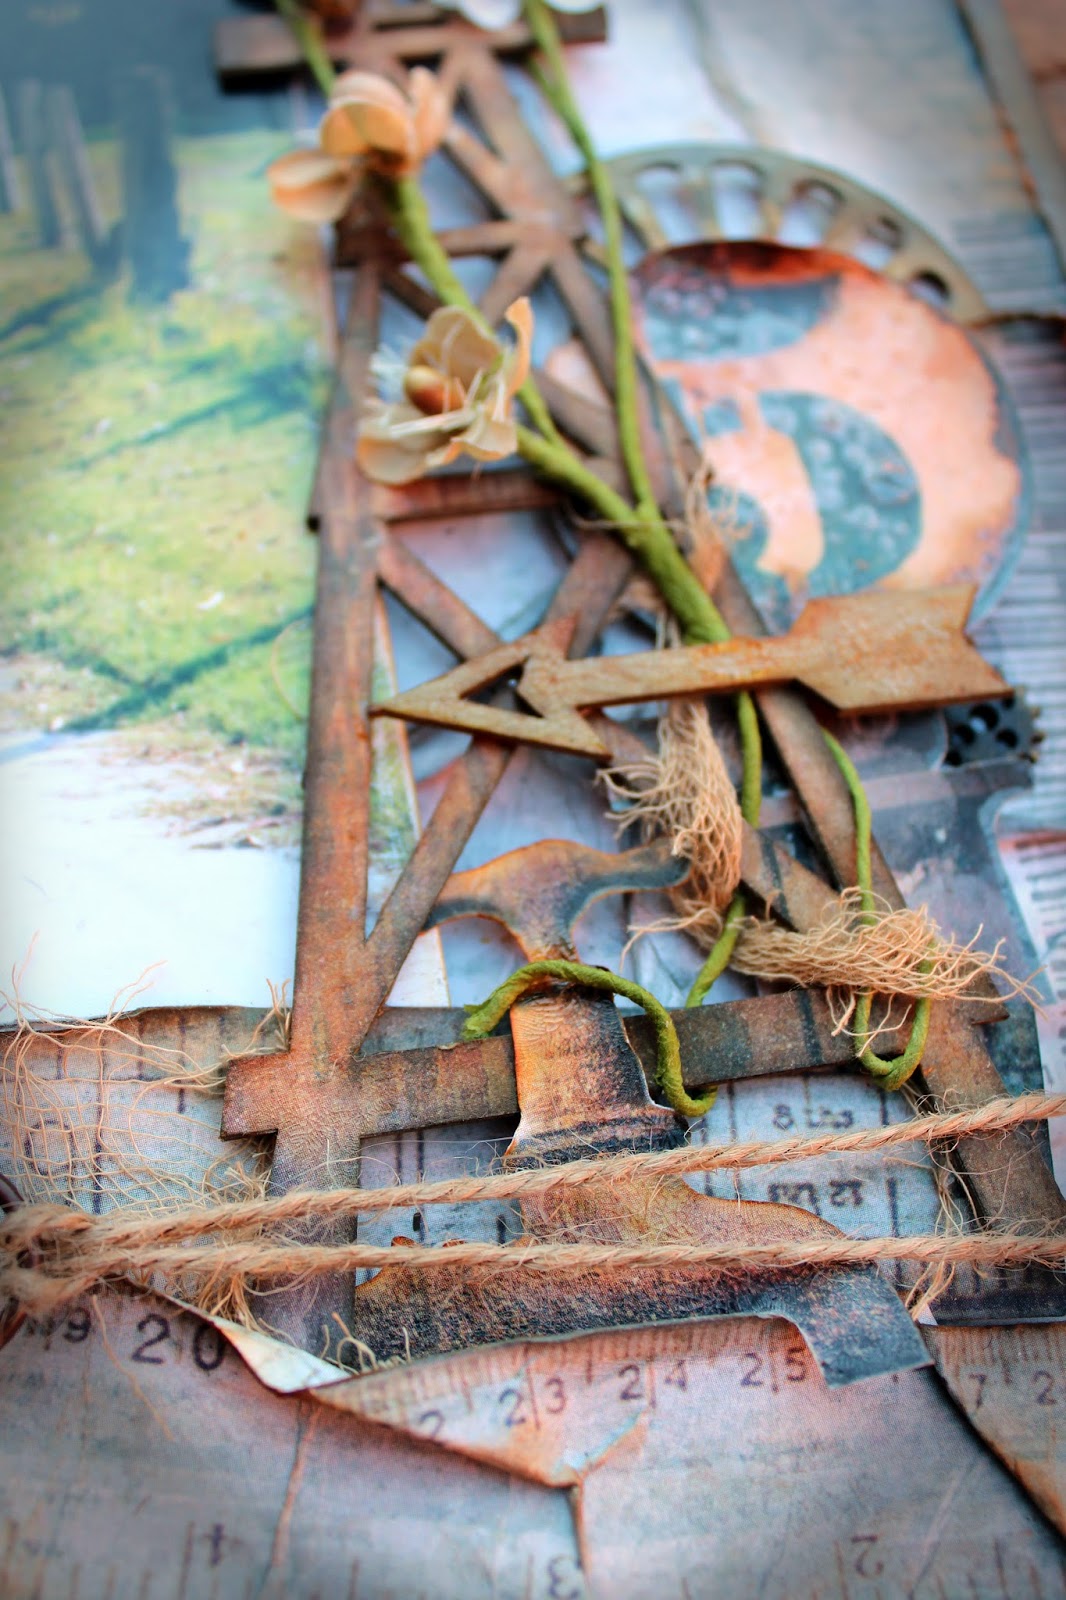
And a few close-ups....


These flourishes are my all time faves.....use them everywhere. These have been misted with glimmer mist and coated with a little iridescent medium. Added a little stamping and some laces.


The mini heart chipboard has been crackled and inked and also glimmer misted.


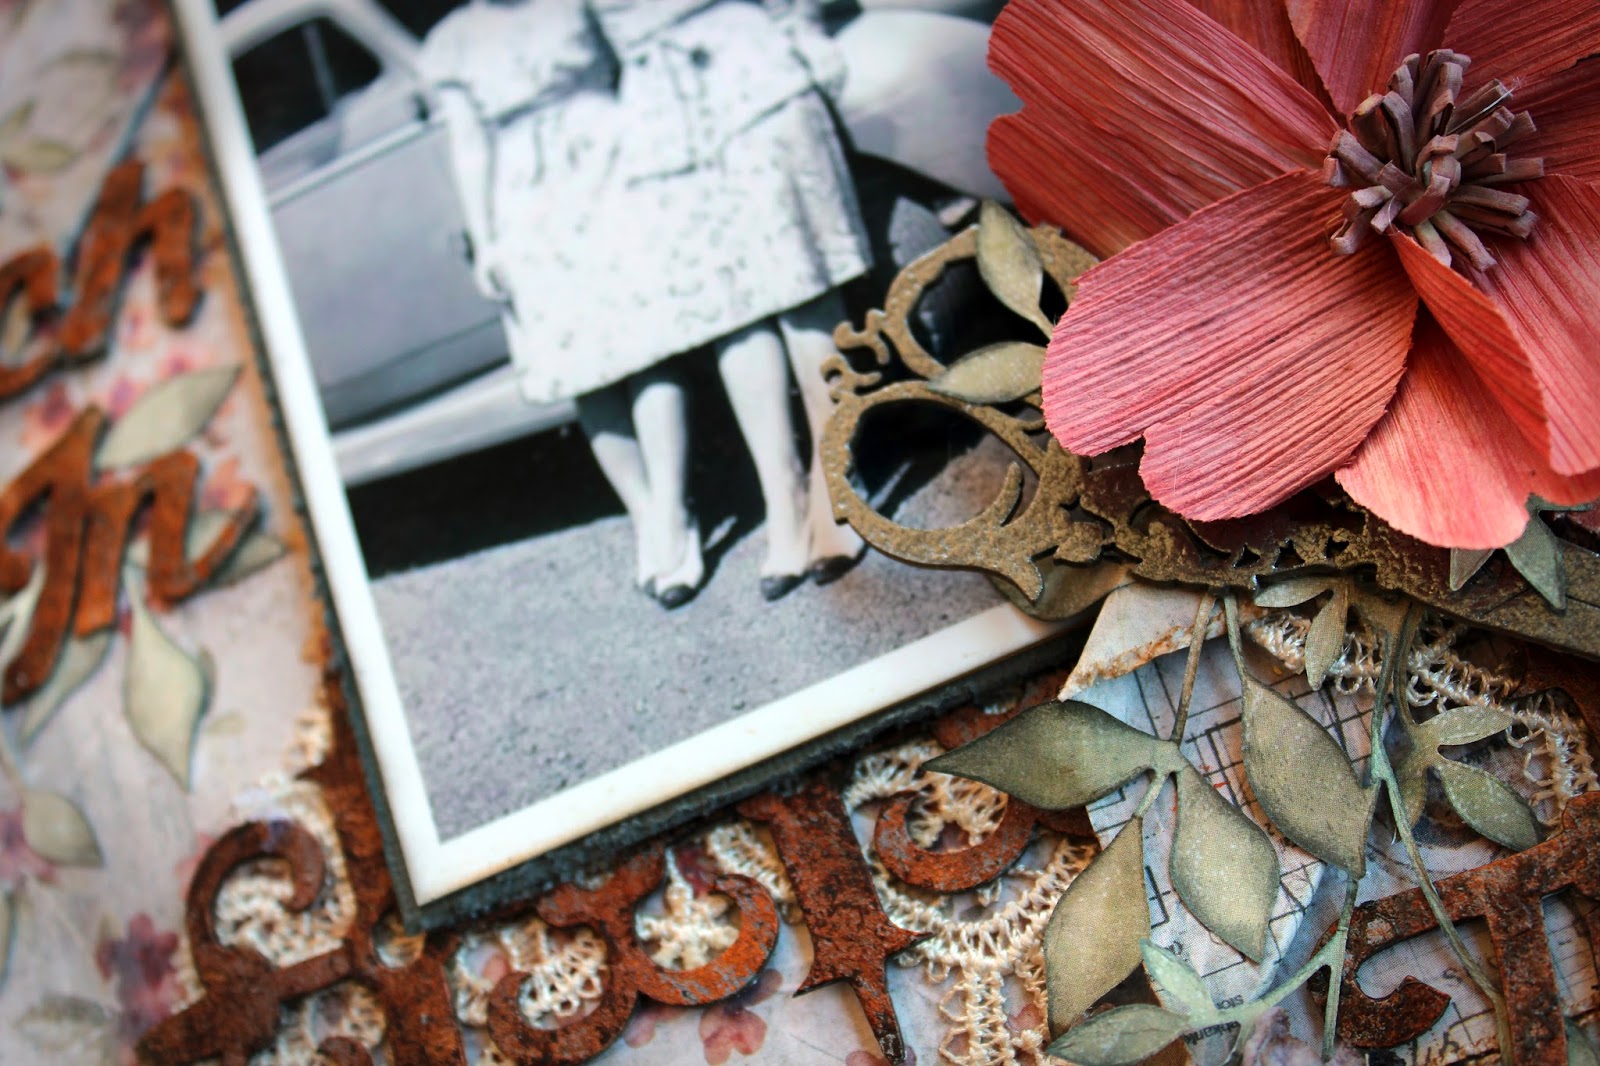
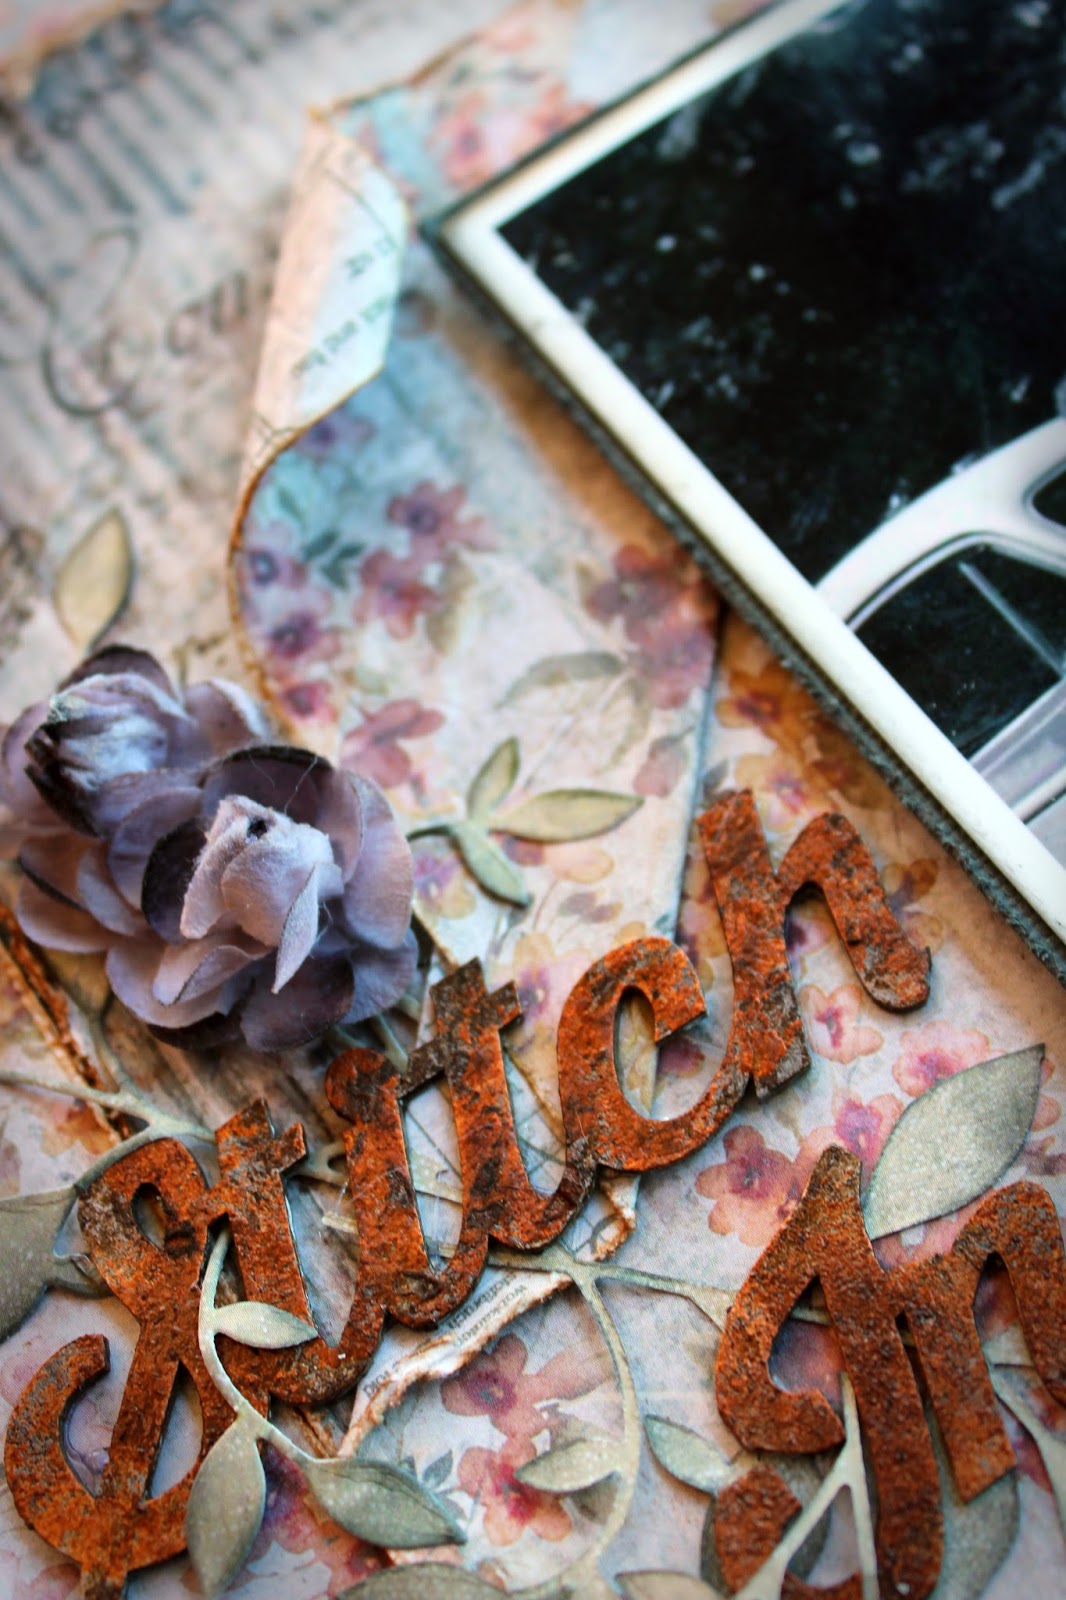
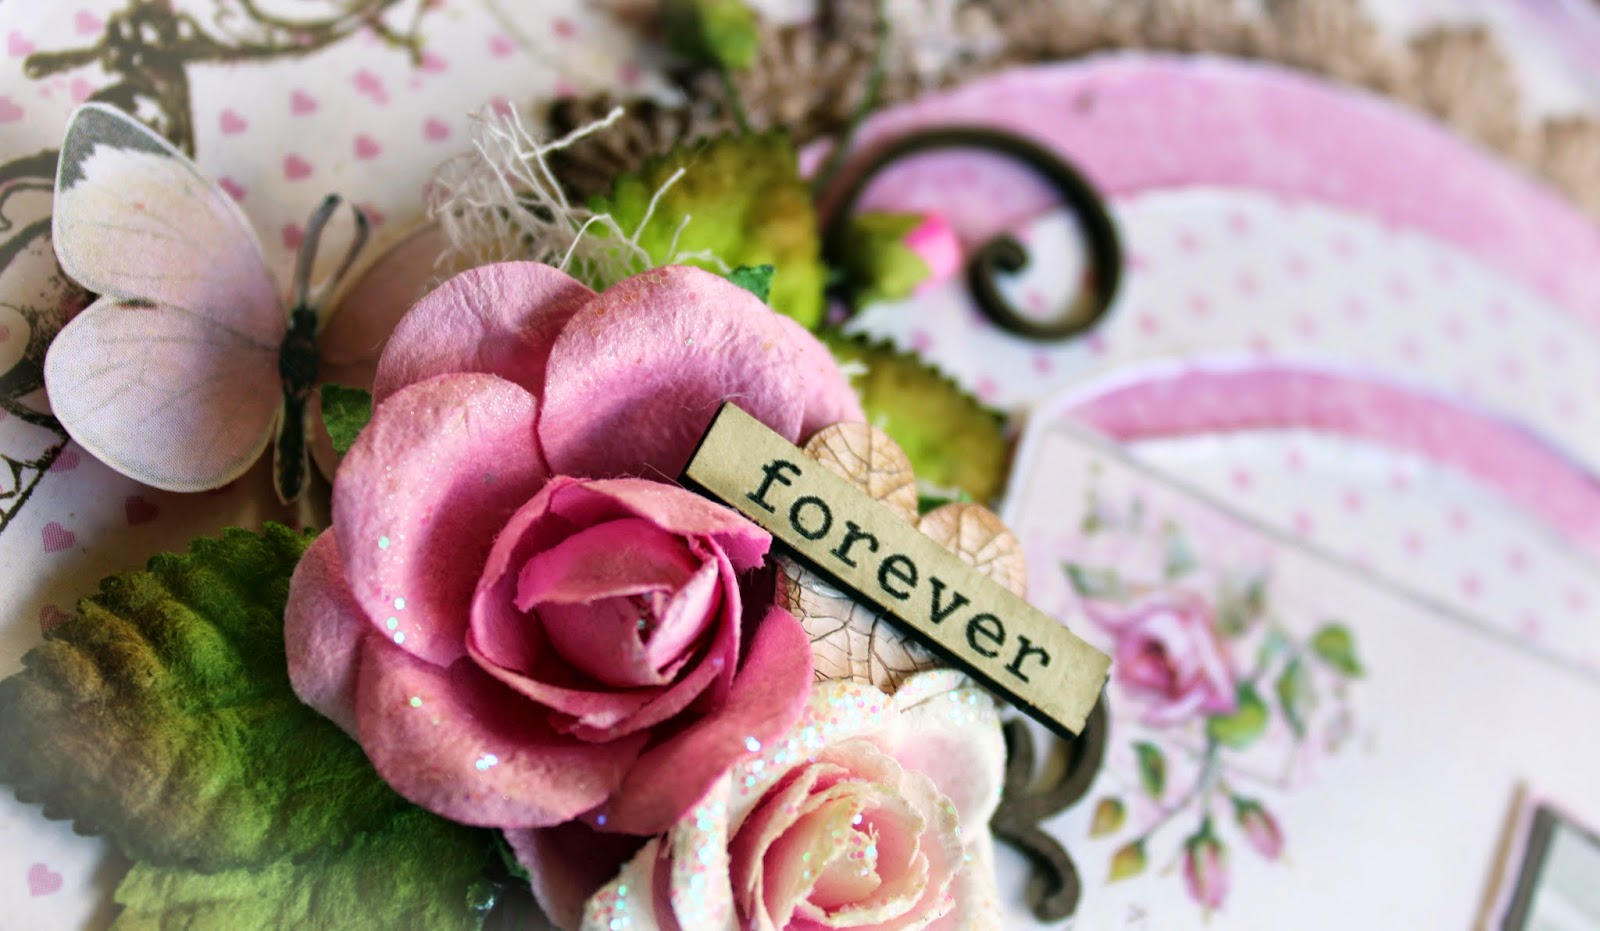
I am loving this Vintage Corner from Memory Maze. So very elegant. I have embossed this one and sat it under the photo for support. The word "Remember" is from a set of words. I have simply misted this. I have also fussy cut the butterflies from the Pion "My Precious Daughter" paper collection. The tags have also been cut from the same range of papers.


These Vintage bobbins I picked up from a op shop find. Best find ever!!! I have also included a lot of  stamping on this layout. Used a number of acrylics with postage images and borders.

I hope you have enjoyed your visit here today. If you keep scrolling you will find a Material List for this layout.

Until next time happy crafting.

Tina xx


Materials Used

Memory Maze Chipboards:
Flourish - Boarder 40
12 x 12 Nested Hearts
Hearts Small
and Vintage Corner
Forever Word Sheet

Bazzill Cardstock
Pion -"My Precious Daughter" Collection
Prima Marketing Flowers
I am Roses Flowers
Green Tara Leaves
Acrylic Stamps - Prima, Bo-Bunny and Kaisercraft
Miscellaneous Wood Button
Vintage Wood Bobbins
Jute
Lace
Embossing Powder - Stampendous Shabby Pink
Archival Ink - Potting Mix
Glimmermist - Tattered Leather and Pinecone


Tuesday 26 August 2014

Stitch in Time


Hello again and welcome back. Today I have a share for those of you that love that vintage rustic feel. Recently my mother in law scanned a very large volume of photos from her mothers collection. So many beautiful photos that I will treasure always. 
So from this photo I have created a  Design Team layout for Fabscraps.
This paper collection is the newly released Oh! Sew Beautiful collection.
So please keep scrolling and I hope you enjoy. 


"Stitch In Time"


I have used some papers from the previous Fabscraps "Gentlemens's Collection". With these papers I cut foliage using a die. Inked the edges with a little Black Soot.


A close-up from another angle. Here, if you look closely, you can see how I have folded the second layer in the middle to wrap around the photo to make it the focal point of the layout. Below the second half to this fold on the page.


A close-up of the Fabscraps Chipboard Scissors. So very elegant. I have tucked this in under the flowers and foliage. It was dressed using Lindy's embossing powders.


I have done a lot of distressing and rolling of the papers to give that Vintage touch to this layout.


The Fabscraps Chipboard Title and Border were dressed using Liquid Pearls and a little Walnut Stain distress ink......gives that rusty look!! 


What you will need:

Fabscraps Gentleman's Club - C66 004
Fabscraps Oh! Sew Beautiful - C68 002
Fabscraps Oh! Sew Beautiful - C68 001
Fabscraps Scissors and Mannequin-1pp - DC68 008
Fabscraps Decorative Border - DC67 008
Fabscraps Stitch In Time - DC68 002
Cardstock (Steel Grey and Rusty Brown Colours)
Lindy's Stamp Gang Embossing Powders (Queens Shebas Silver)
Foliage Die
Prima Resin Clock
Assortment of Flowers (I have used Prima and Petaloo for this layout)
Distress Inks (Vintage Photo and Walnut Stain, Black Soot)

Instructions:

1. Take Fabscraps C68 002 and make a 3cm framework. Distress the inner and outer framework and ink with Vintage Photo Distress Ink. Adhere the outer framework to a distress Steel Grey Cardstock.

2. Take Fabscraps C68 001 and cut from the left corner a square measuring 24.5cm. Distress and ink this as previous. Adhere to centre of layout. Take C68 002 inner square and fold back top left and bottom right corners as shown. Roll the top left corner. Adhere this to the centre of layout.

3. Dress Chipboards (Title, Border have been gessoed and liberally covered with Liquid Pearls (Copper Pearl). Once dried I have inked with Walnut Stain and Black Soot distress inks. The Chipboard Scissors were dressed using Lindys embossing powder ( Queen Sheba Silver). I then cut the border into segments to give the illusion that it runs the length of the layout.

4. Cut 4 foliage segments using die of your choice. Ink the edges with Black Soot Distress Inks.

5. You can start to embellish page by firstly adhering down the lace to run across the base of layout under and over folded corner. Adhere cut segments of chipboard border over the lace. Adhere mounted photo which has been inked over the left corner fold and under the right corner fold.

6. Tuck in foliage and adhere flowers as seen in layout. Lastly adhere cut up title and scissors. I also added a second piece of cardstock ( a rusty brown colour) to the back of the layout and distressed the top layers a little more.

7. Your layout is ready to be framed and hung!!

Tuesday 19 August 2014

"Darling"


Welcome back. Today I have another share for my Fabulicious Design Team.
I have used yet again the Industrial Chic Collection. I have come to be infatuated with these papers. So very versatile. You can use these for vintage, and masculine but also for the shabby chic style as I have done here.

I hope you enjoy your visit here. If you keep scrolling to the bottom of the page I have included lots of close-ups photos along with the materials used and instructions.


"Darling"


Chipboard embossed with Lindy's Stamp Gang's Embossing Powders.


Flowers have been dry brushed with a little gesso.


Love these number plates from the die cut papers packs.


Added in a die cut picket fence in amongst and behind the flowers with a touch of distressed cheesecloth to soften the layout.


You can see here at the base of the photo the handmade transparency embellishment made from a border stamp and some embossing powders.


Wood panelling made to look real. Cut it up into panels and heavily distressed it to show the black cardstock backing behind.


The chipboard clock painted with gesso and randomly inked with a little Watering Can archival ink.

Hope you have enjoyed these close-ups.

See you again very soon.

Tina xx


Materials you will need:

Fabscraps Wood Chic C67 001
Fabscraps Paintl Chic 2 C67 006
Fabscraps Paint Chic  C67 005
Fabscraps Industrial Chic Die Cut pages
Fabscraps Clock With Hands DC66 013
Fabscraps Chipboard Word "Darling"
Lindy's Stamp Gang Embossing Powders (Queen Sheba's Silver, and Midnight Pewter Obsidian)
Archival Ink - Watering Can
Versa Mark Embossing Ink
Cheesecloth (White)
Black Core Cardstock
Transparency Paper
Rhinestone Flourishes (Black)
Flowers in Peach, grey and black colours
Leaves
Fence Die
Gesso
Border Stamp
Butterfly Stamp

Instructions:

1. Take Fabscraps Wood Chic and tear a section out of the bottom. Then cut the panels of the wood and distress heavily. Adhere back together on a piece of heavily distressed black core cardstock.

2. Take Fabscraps Paintl Chic 2 and cut a panel of the boxes and distress heavily.

3. Take Fabscraps Paint Chic (floral side) and cut a 14.5cm wide x 23cm mat and tear at the base. Distress and back with a piece of distressed black core cardstock . Adhere to right side of page as shown. Adhere Paintl Chic 2 strip at base as shown in layout.

4. Take remaining Paint Chic (stripe side) and cut another mat measuring 12cm wide x 18cm and tear at base. Distress and back with a piece of distressed black core cardstock. Adhere atop of the first matting. Cut a mat from black core cardstock and back your sanded photo and adhere atop of the matted pieces.

5. Cut chipboard clock in two pieces. Gesso with two coats and allow to dry. Once dry ink randomly with Watering Can archival ink. Adhere to layout. Cut tag and number plate from Industrial Chic pages and distress. Curl the number plate and adhere to the left atop of the clock as shown. Tuck tag at right of photo.

6. Transparency Embellishments: This is one of my most favourite things to create!! My own embellishments using embossing powders, stamps and transparency paper. Please ensure you have Overhead Tranparency paper not Binding Cover paper because your heating tool will melt it!! 
Firstly stamp you Transparency paper with Border stamp using an embossing ink. Sprinkle over Midnight Pewter Obsidian embossing powder. Shake off excess and heat set. Be careful not to over heat! Cut out image and adhere to layout using clear drying glue. For this layout I have made sever of the border stamps ( 6 in fact). I have arranged them around the boxes at the base of the photo and at the top of the photo. I have also made a butterfly embellishment which sits at the right of the photo coming out of the flowers and leaves.

7. Cut 2 x Fences using a diecut and gesso . Ink randomly with a little Watering Can archival ink and bend up. These sit in and aroud the flowers and leaves as shown in the layout. Adhere down all flowers and leaves. Tuck in a little distressed muslin around the embellishments and coming out from base of panelling.

8. Emboss Chipboard word "Darling" using Lindy's Stamp Gang - Queen Sheba's Silver. I went over it a couple of times to give a thickness to the title. Mount and adhere atop of the flowers and fencing at the base of the photo.. Finally add your rhinestone flourishes. I also added a few rhonestones to the clock at the right of the photo.

9. Your layout is now complete. Just frame and hang.

Sunday 3 August 2014

On the Edge

Welcome back. Today I have another Design Team share for Fabscraps new,  "Oh! Sew Beautiful" collection. Now believe it or not this is a collection full of beautiful Haberdashery pattern papers which I have designed this rustic grungy boy layout around. I have also incorporated the previous Industrial Chic Collection of Chipboards and Journal Book with these fabulously beautiful papers.

I hope you enjoy this with close-ups, a materials list and full instructions to follow. 


This photo of my son Hayden was taken a few months ago on one of our afternoon walks. He has only just started to learn how to ride the skateboard with only a few minor scrapes and bruises due to many of the hilly paths we take!!


I have intertwined the vine around the windmill and added in a little coffee stained cheesecloth to soften the layout.


I made a tear at the top of the layout with a number plate inserted and again a little cheesecloth tucked in.


The bubble effect created on the #5 circle was made by heating nearly dried Crackle Accents. Cool effect.


And some random stamping with a Barcode acrylic stamp.

Thank you for taking the time to stop bye. Please let me know what you think.

Till next time take care.

Tina x


What you will need:
  • Fabscraps Oh! Sew Beautiful Collection - Dress Pattern C68 007
  • Fabscraps Oh! Sew Beautiful Collection - Haberdashery C68 008
  • Fabscraps Chipboard Word (On the Edge) DC67 006
  • Fabscraps Chipboard Arrow and Circle - DC67 009
  • Fabscraps Chipboard Windmill to fit journal Pic. DC67 014
  • Fabscraps Journal Book Industrial Chic C67 Collection
  • Acrylic Stamps 
  • Embossing Ink 
  • Rusting Powder and Vinegar
  • Distressing Ink ( Walnut Stain, Vintage Photo, Rusty Hinge) 
  • Archival Ink (Watering Can)
  • Crackle Accents / Dimensional Magic or similar
  • Coffee Stained Cheesecloth
  • Metal Cog embellishment 
  • Prima Vine
  • Hessian Jute
  • 2 or 3 Metal Embellishments
Instructions:
  • From Industrial Chic Journal book carefully pull out wind mill cut out. Also carefully cut out plate numbers (you will need two), #5 on piping and #5 on corrugation, #2 circle, and tap.
  • Distress and Ink these with Rusty Hinge distress ink and Watering Can Archival randomly. On the orange # 5 I applied a good coat of Crackle Accents. Let it dry for approximately 10 minutes and then heat set until it starts bubbling. Cool effect!! You could also do this with the others. I only applied a small amount of Crackle Accents around the edges to highlight the inking. If you don't have Crackle Accents, Dimensional Magic will do the same.
  • Adhere windmill cut out to chipboard and ink. Apply Crackle accents randomly and allow to dry.
  • With Chipboard circle, arrow and Chipboard title ink with all colours randomly. Apply crackle accents to circle and arrow and allow to dry. With the chipboard title I applied a little rusting powder randomly and set with vinegar. When dry you may have to reapply some more ink as the vinegar tends to dull the colours. Then apply a smearing of crackle accents randomly and leave to dry.
  • Take patterned paper titled Dress Pattern and cut four of the measuring strips. Adhere to an old piece of cardstock or chipboard at each edge. Distress and ink. Next take patterned paper titled Haberdashery. You will be using the plain side with the corrugation. Randomly stamp with barcodes using Watering Can ink. Distress paper very heavily and crumple paper on creases that you can see in paper. Adhere to base.Make a tear at the top of layout and adhere in one of the number plates as shown.
  • Cut two more measuring tapes, ink and distress and crumple to adhere going across base of layout. Atop this adhere the second number plate. Adhere sanded and inked photos. I have used a 4 x 6 inch portrait photo with a second  half sized photo. Layer them overlapping and sitting in and on measuring tapes. See layout for positioning. 
  • Start embellishing by firstly mounting the windmill. Adhere it down and tuck in half the chipboard circle, #5 circle and tap. Wind vines through windmill and around tap. Adhere arrow on top of vine and windmill.
  • Adhere two metal embellishments at each end of number plate and wrap a piece of hessian jute through and around back of page and back around to front of layout and tie off. Fray ends and adhere with clear drying glue. Adhere remaining embellishments as shown in layout.
  • Ready to frame and hang!


Special Guest

Special Guest
2017