Welcome back. Today I have another Design Team share for Fabscraps new, "Oh! Sew Beautiful" collection. Now believe it or not this is a collection full of beautiful Haberdashery pattern papers which I have designed this rustic grungy boy layout around. I have also incorporated the previous Industrial Chic Collection of Chipboards and Journal Book with these fabulously beautiful papers.
I hope you enjoy this with close-ups, a materials list and full instructions to follow.

This photo of my son Hayden was taken a few months ago on one of our afternoon walks. He has only just started to learn how to ride the skateboard with only a few minor scrapes and bruises due to many of the hilly paths we take!!

I have intertwined the vine around the windmill and added in a little coffee stained cheesecloth to soften the layout.

I made a tear at the top of the layout with a number plate inserted and again a little cheesecloth tucked in.

The bubble effect created on the #5 circle was made by heating nearly dried Crackle Accents. Cool effect.
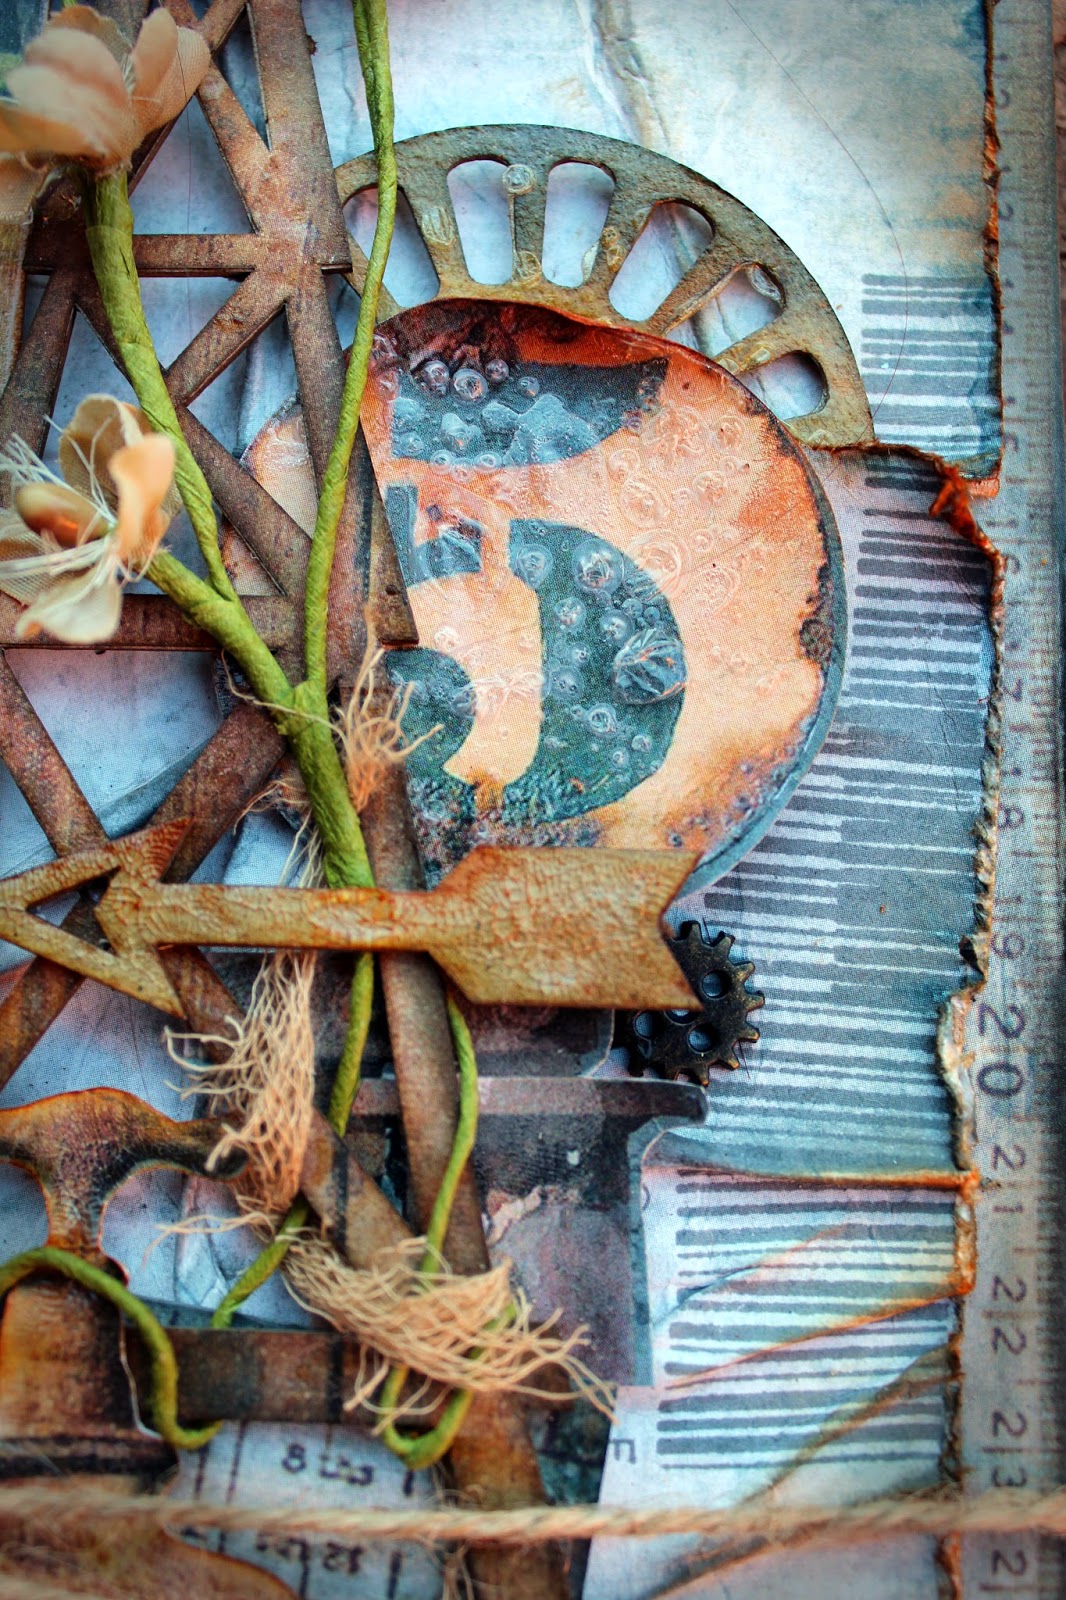
And some random stamping with a Barcode acrylic stamp.
Thank you for taking the time to stop bye. Please let me know what you think.
Till next time take care.
Tina x

What you will need:
- Fabscraps Oh! Sew Beautiful Collection - Dress Pattern C68 007
- Fabscraps Oh! Sew Beautiful Collection - Haberdashery C68 008
- Fabscraps Chipboard Word (On the Edge) DC67 006
- Fabscraps Chipboard Arrow and Circle - DC67 009
- Fabscraps Chipboard Windmill to fit journal Pic. DC67 014
- Fabscraps Journal Book Industrial Chic C67 Collection
- Acrylic Stamps
- Embossing Ink
- Rusting Powder and Vinegar
- Distressing Ink ( Walnut Stain, Vintage Photo, Rusty Hinge)
- Archival Ink (Watering Can)
- Crackle Accents / Dimensional Magic or similar
- Coffee Stained Cheesecloth
- Metal Cog embellishment
- Prima Vine
- Hessian Jute
- 2 or 3 Metal Embellishments
Instructions:
- From Industrial Chic Journal book carefully pull out wind mill cut out. Also carefully cut out plate numbers (you will need two), #5 on piping and #5 on corrugation, #2 circle, and tap.
- Distress and Ink these with Rusty Hinge distress ink and Watering Can Archival randomly. On the orange # 5 I applied a good coat of Crackle Accents. Let it dry for approximately 10 minutes and then heat set until it starts bubbling. Cool effect!! You could also do this with the others. I only applied a small amount of Crackle Accents around the edges to highlight the inking. If you don't have Crackle Accents, Dimensional Magic will do the same.
- Adhere windmill cut out to chipboard and ink. Apply Crackle accents randomly and allow to dry.
- With Chipboard circle, arrow and Chipboard title ink with all colours randomly. Apply crackle accents to circle and arrow and allow to dry. With the chipboard title I applied a little rusting powder randomly and set with vinegar. When dry you may have to reapply some more ink as the vinegar tends to dull the colours. Then apply a smearing of crackle accents randomly and leave to dry.
- Take patterned paper titled Dress Pattern and cut four of the measuring strips. Adhere to an old piece of cardstock or chipboard at each edge. Distress and ink. Next take patterned paper titled Haberdashery. You will be using the plain side with the corrugation. Randomly stamp with barcodes using Watering Can ink. Distress paper very heavily and crumple paper on creases that you can see in paper. Adhere to base.Make a tear at the top of layout and adhere in one of the number plates as shown.
- Cut two more measuring tapes, ink and distress and crumple to adhere going across base of layout. Atop this adhere the second number plate. Adhere sanded and inked photos. I have used a 4 x 6 inch portrait photo with a second half sized photo. Layer them overlapping and sitting in and on measuring tapes. See layout for positioning.
- Start embellishing by firstly mounting the windmill. Adhere it down and tuck in half the chipboard circle, #5 circle and tap. Wind vines through windmill and around tap. Adhere arrow on top of vine and windmill.
- Adhere two metal embellishments at each end of number plate and wrap a piece of hessian jute through and around back of page and back around to front of layout and tie off. Fray ends and adhere with clear drying glue. Adhere remaining embellishments as shown in layout.
- Ready to frame and hang!

This looks amazing, love the distressed look of your papers and all the layers and your chipboard pieces look wonderful..love your layout!
ReplyDeleteThanks so very much Lizzy.....xx
ReplyDelete