Thursday 26 June 2014

Once Upon A Time

Happy Friday to you. 
Today I have another share of a design layout that I have created for Bella Paperie using lots of Blue Fern goodies including my all time favourite thing to use ......yes Chipboards!! And this layout has a lot. So if you too love to use Chipboards then this may interest you.

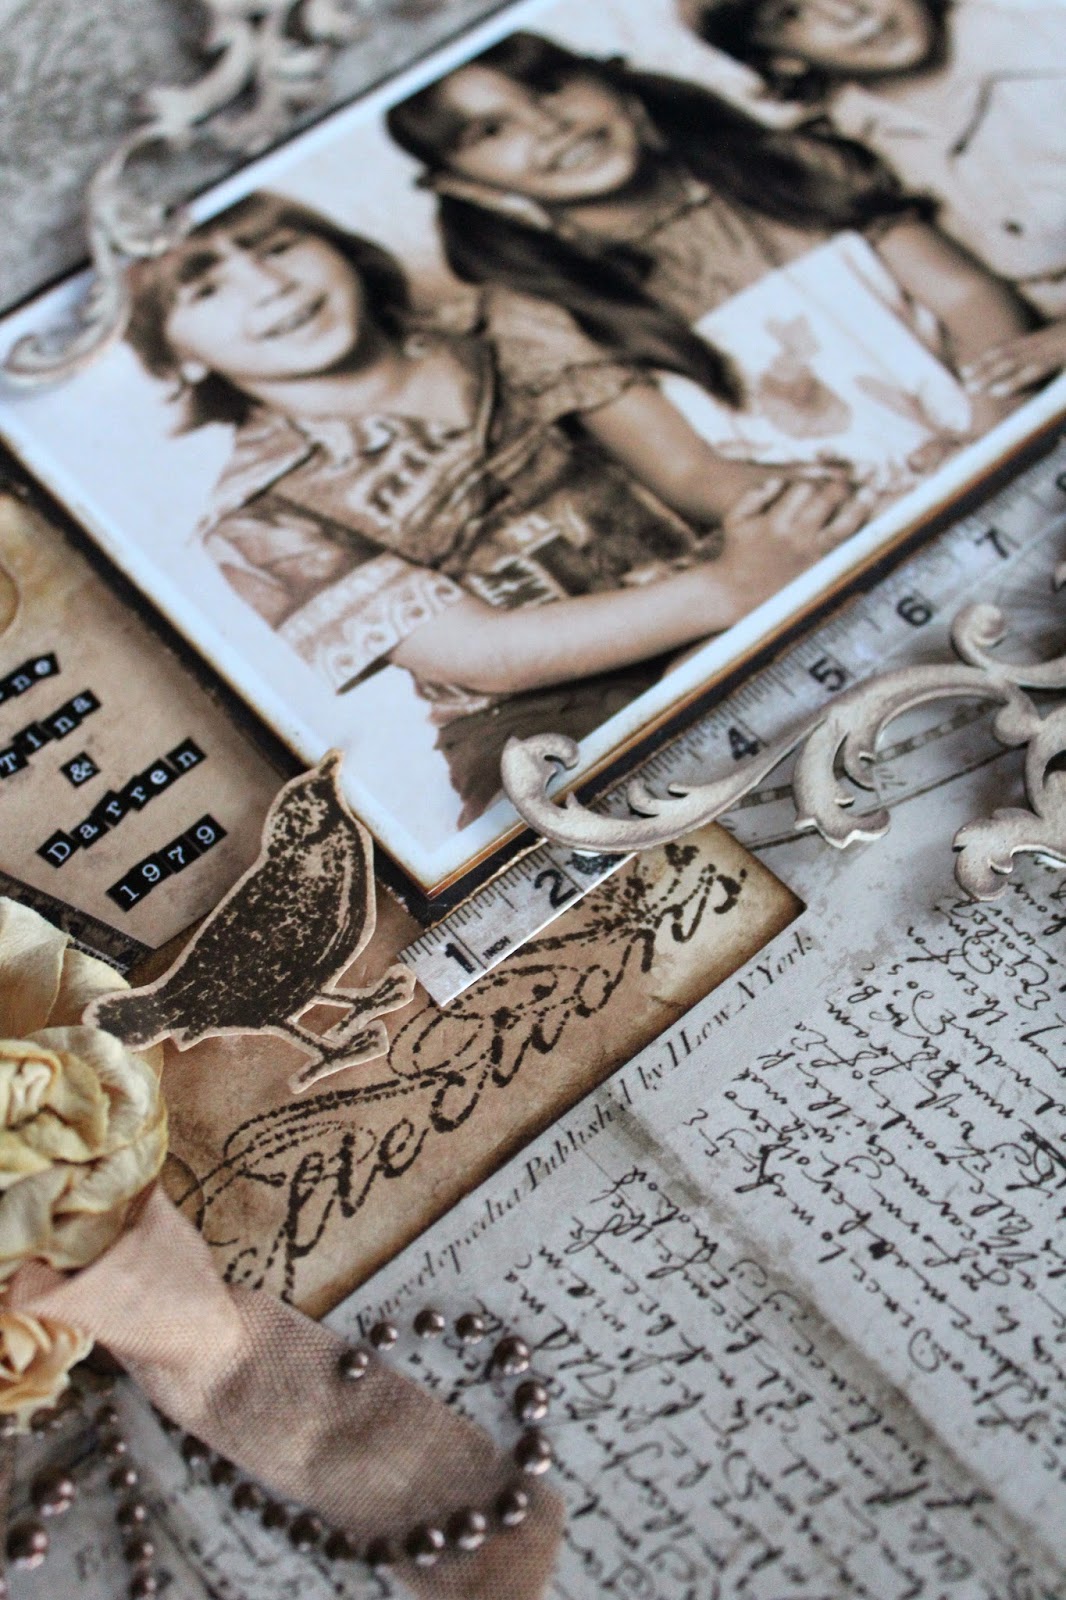
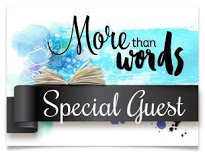
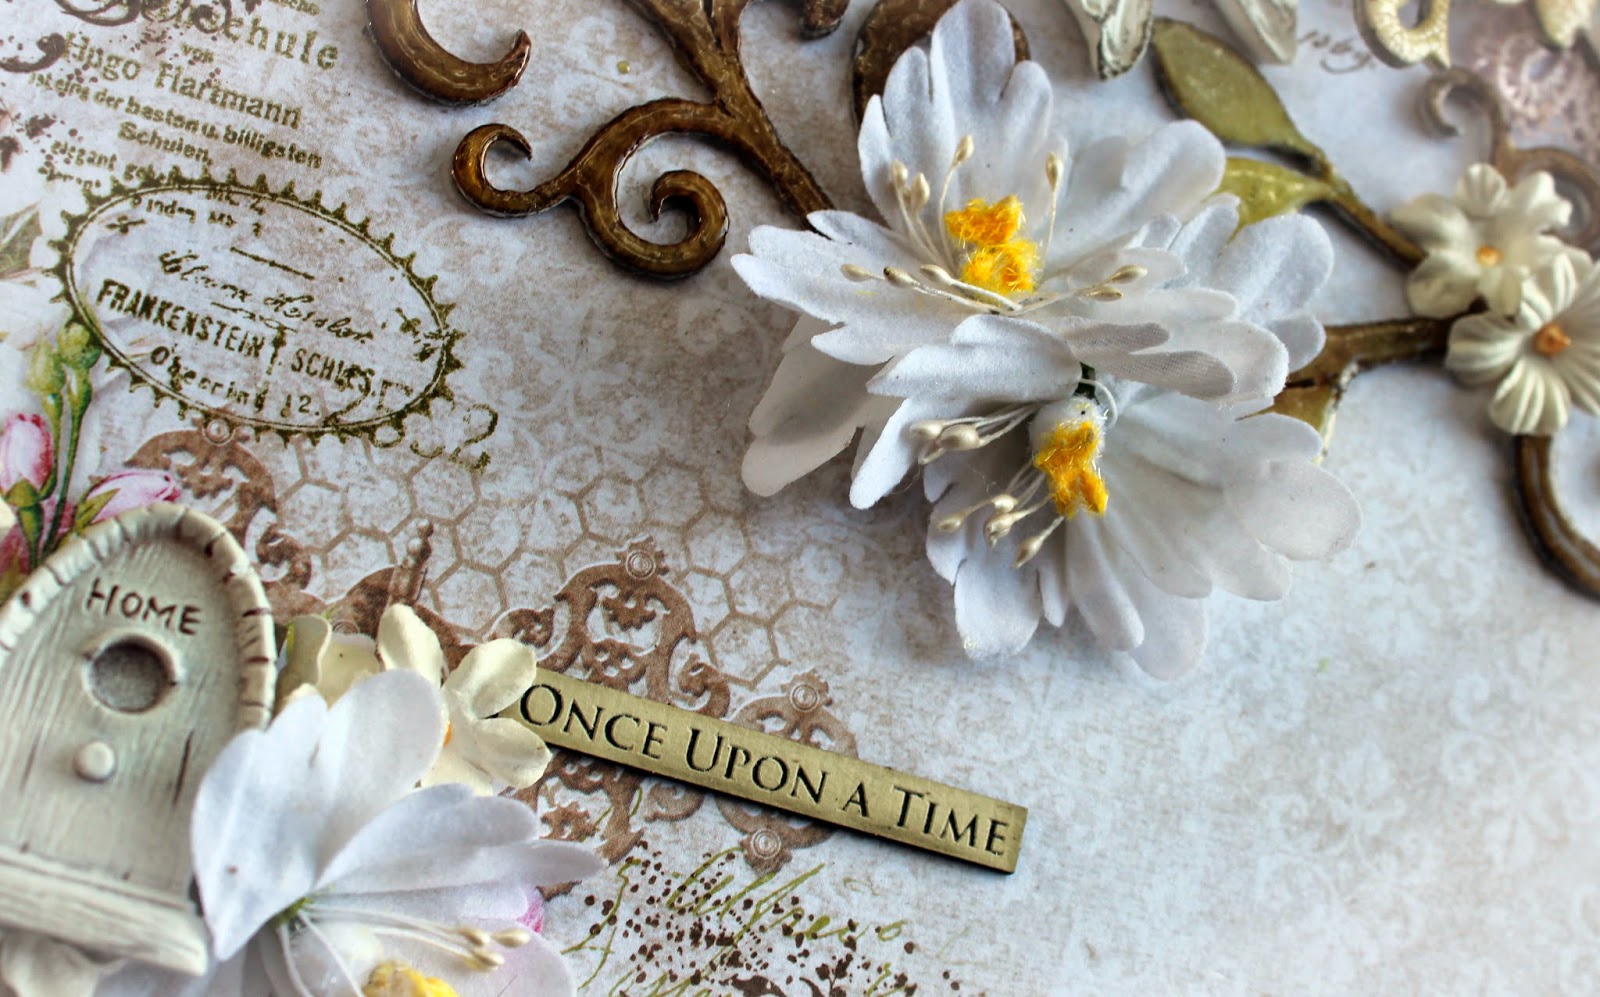
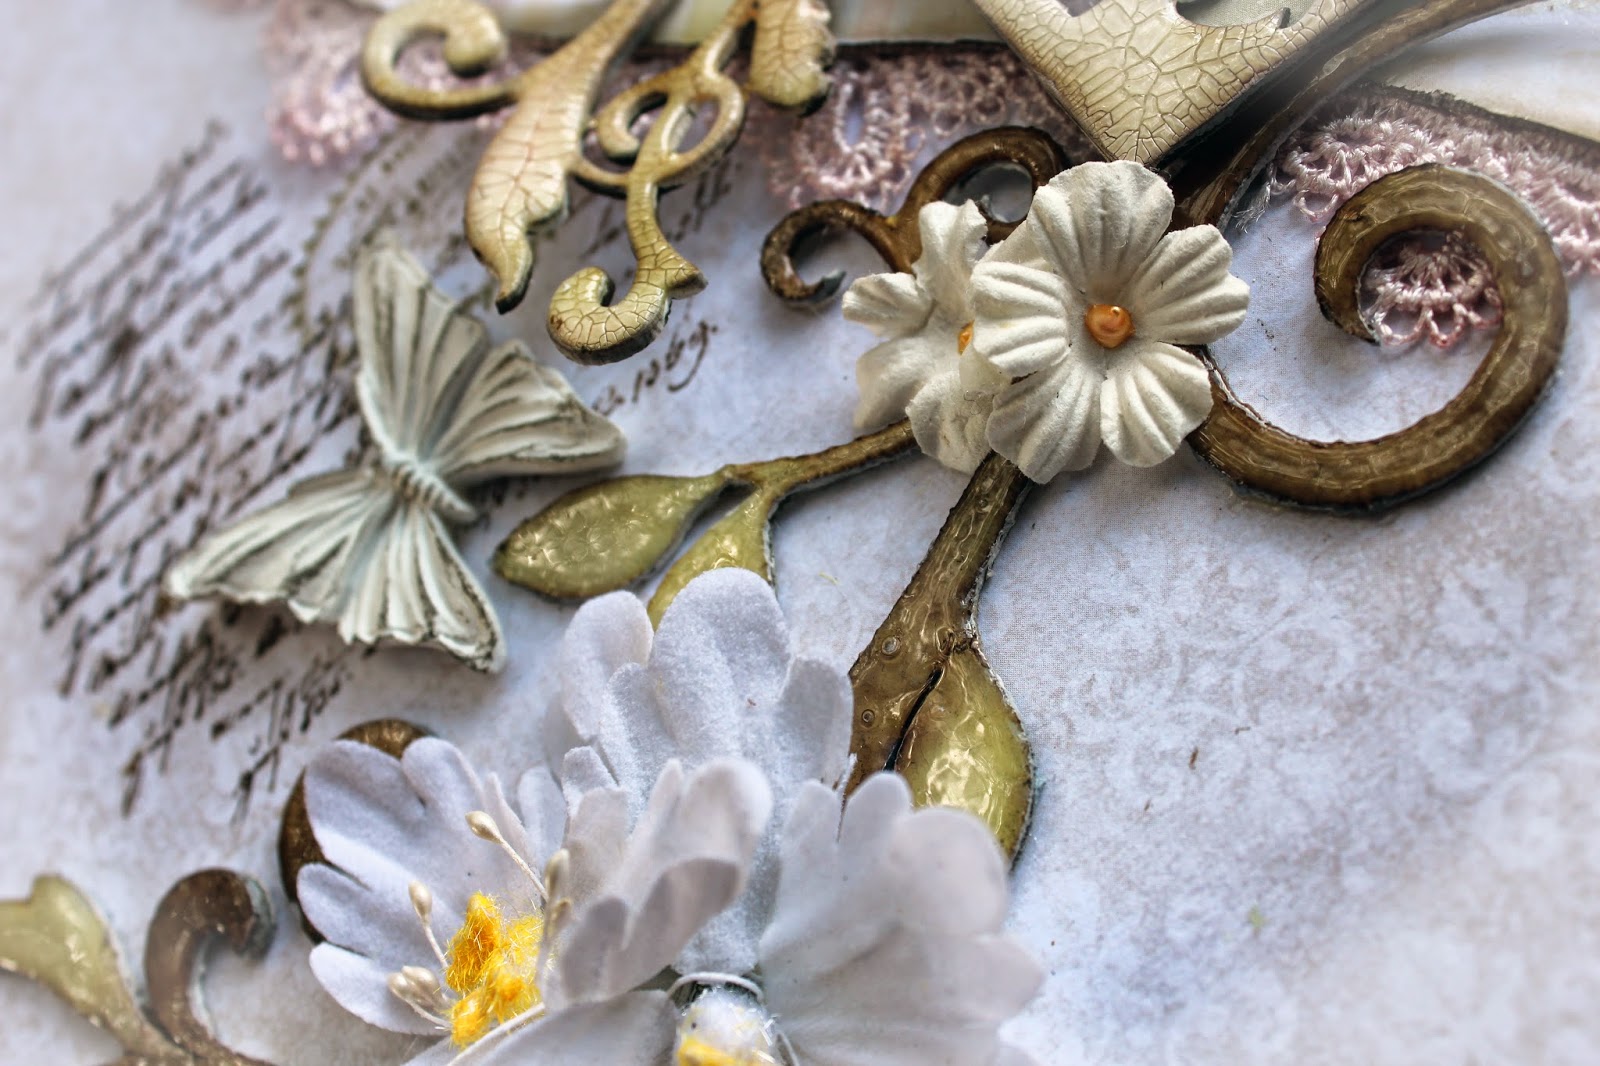
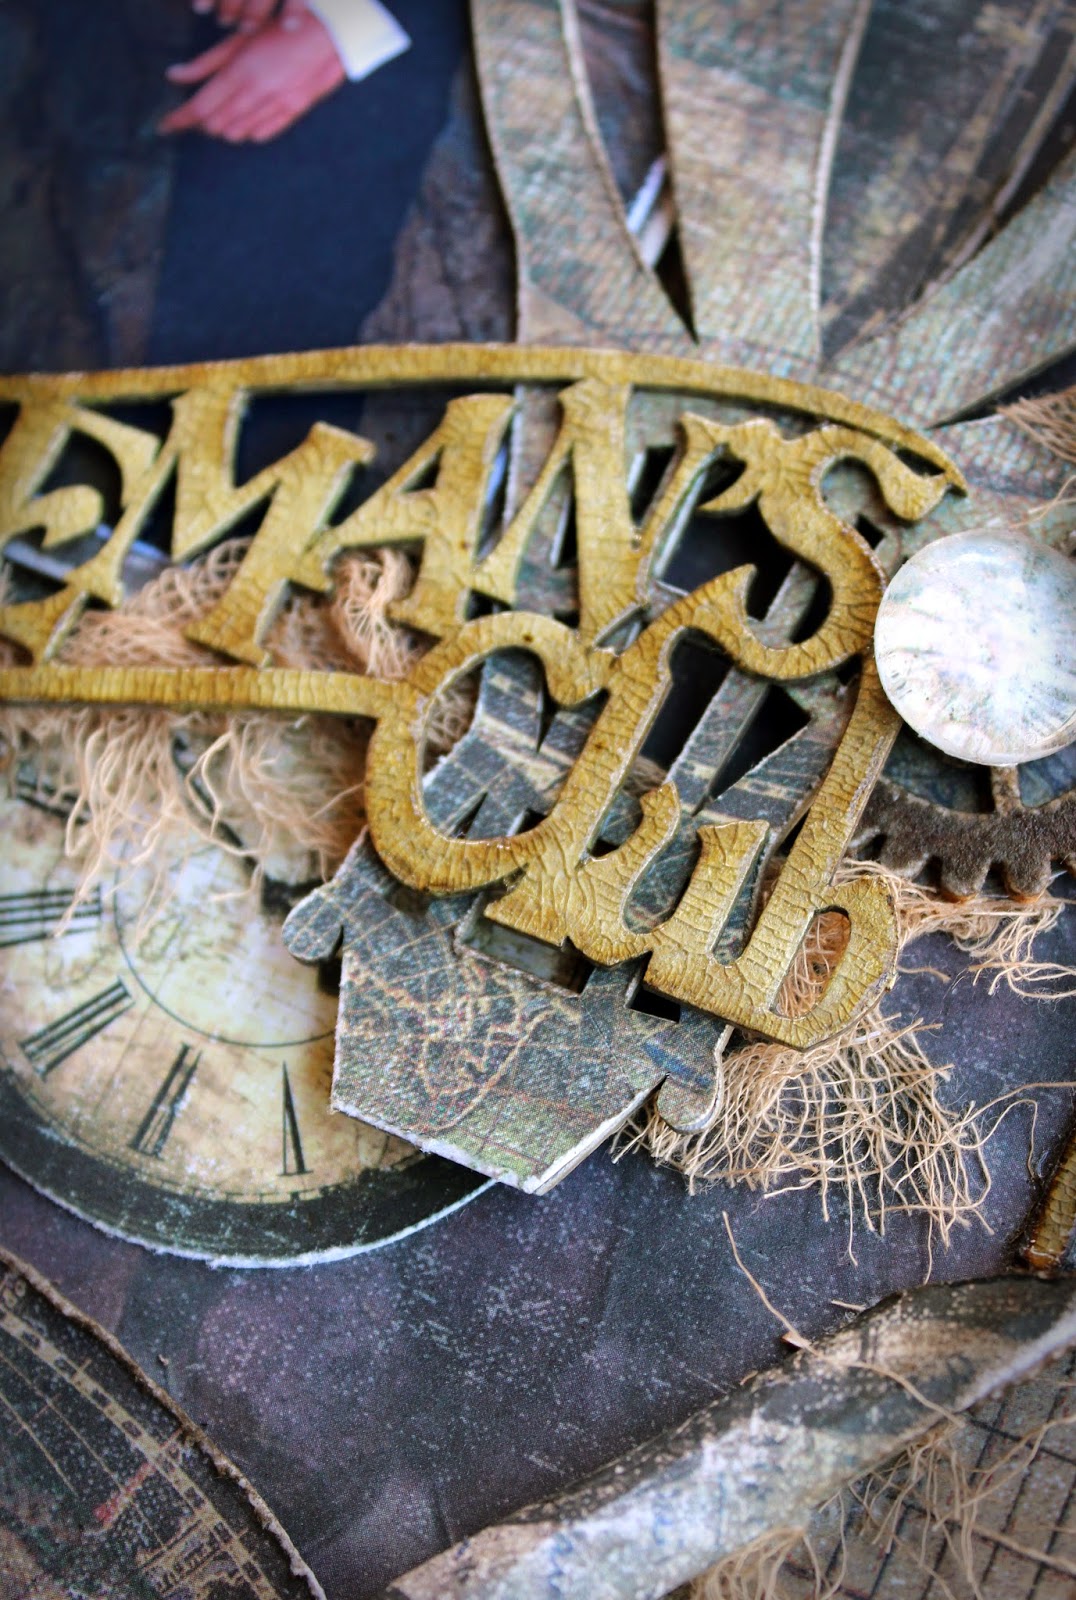
I have a few close-ups and details of the layout below which I have titled "Once Upon A Time". 
Enjoy.......


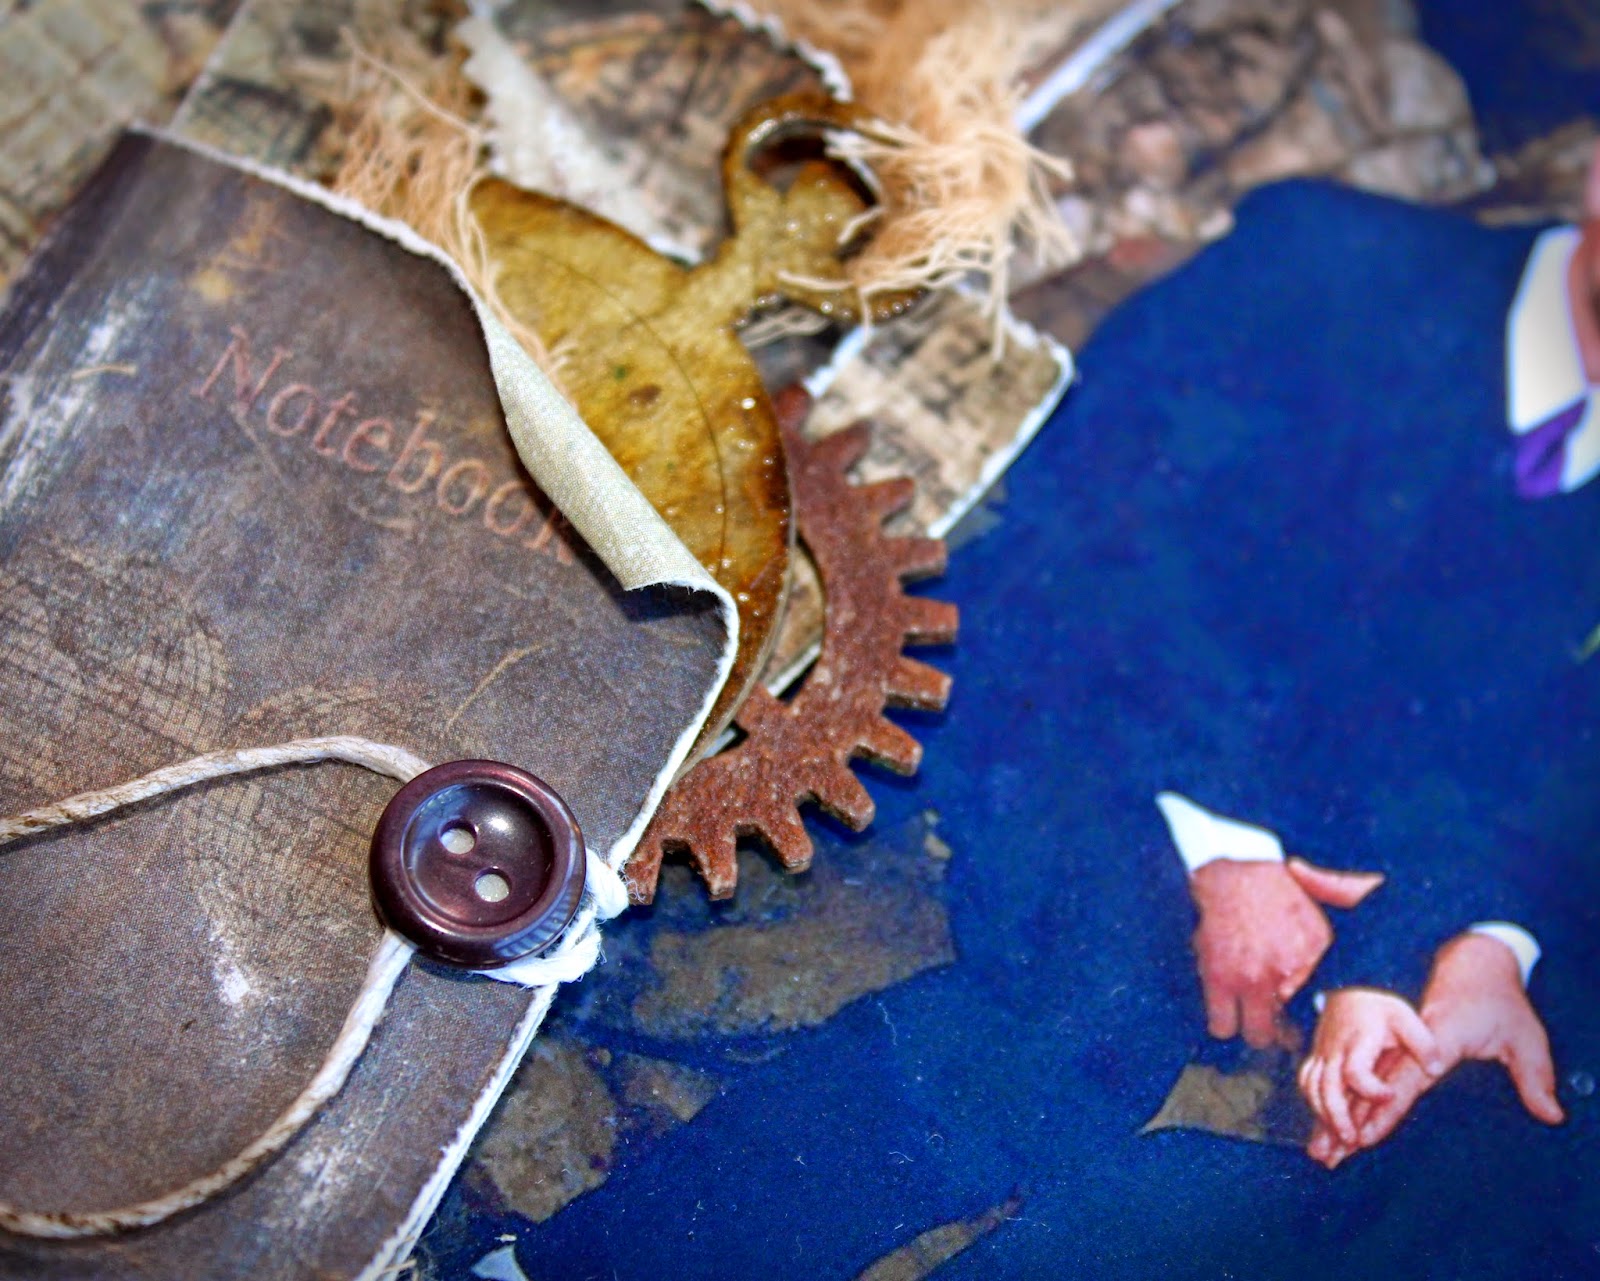
I started off the layout with Stamping the framework of the papers! I have used a mixture of Archival Inks and Distress Inks.


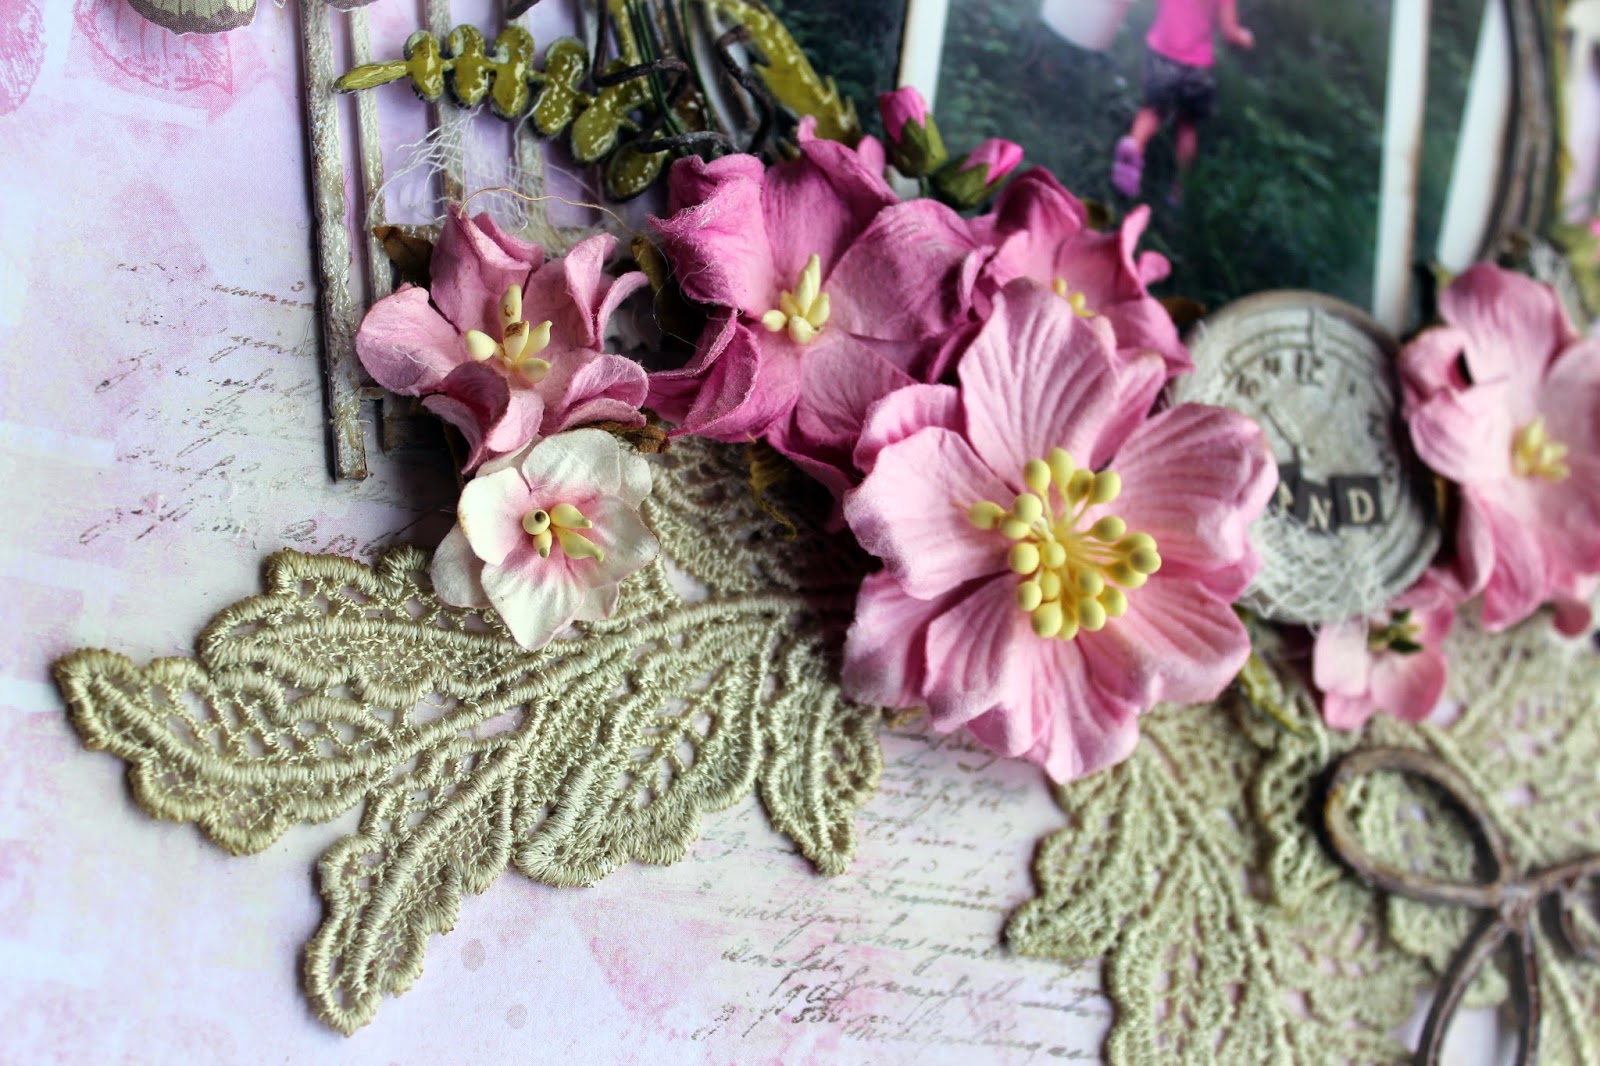
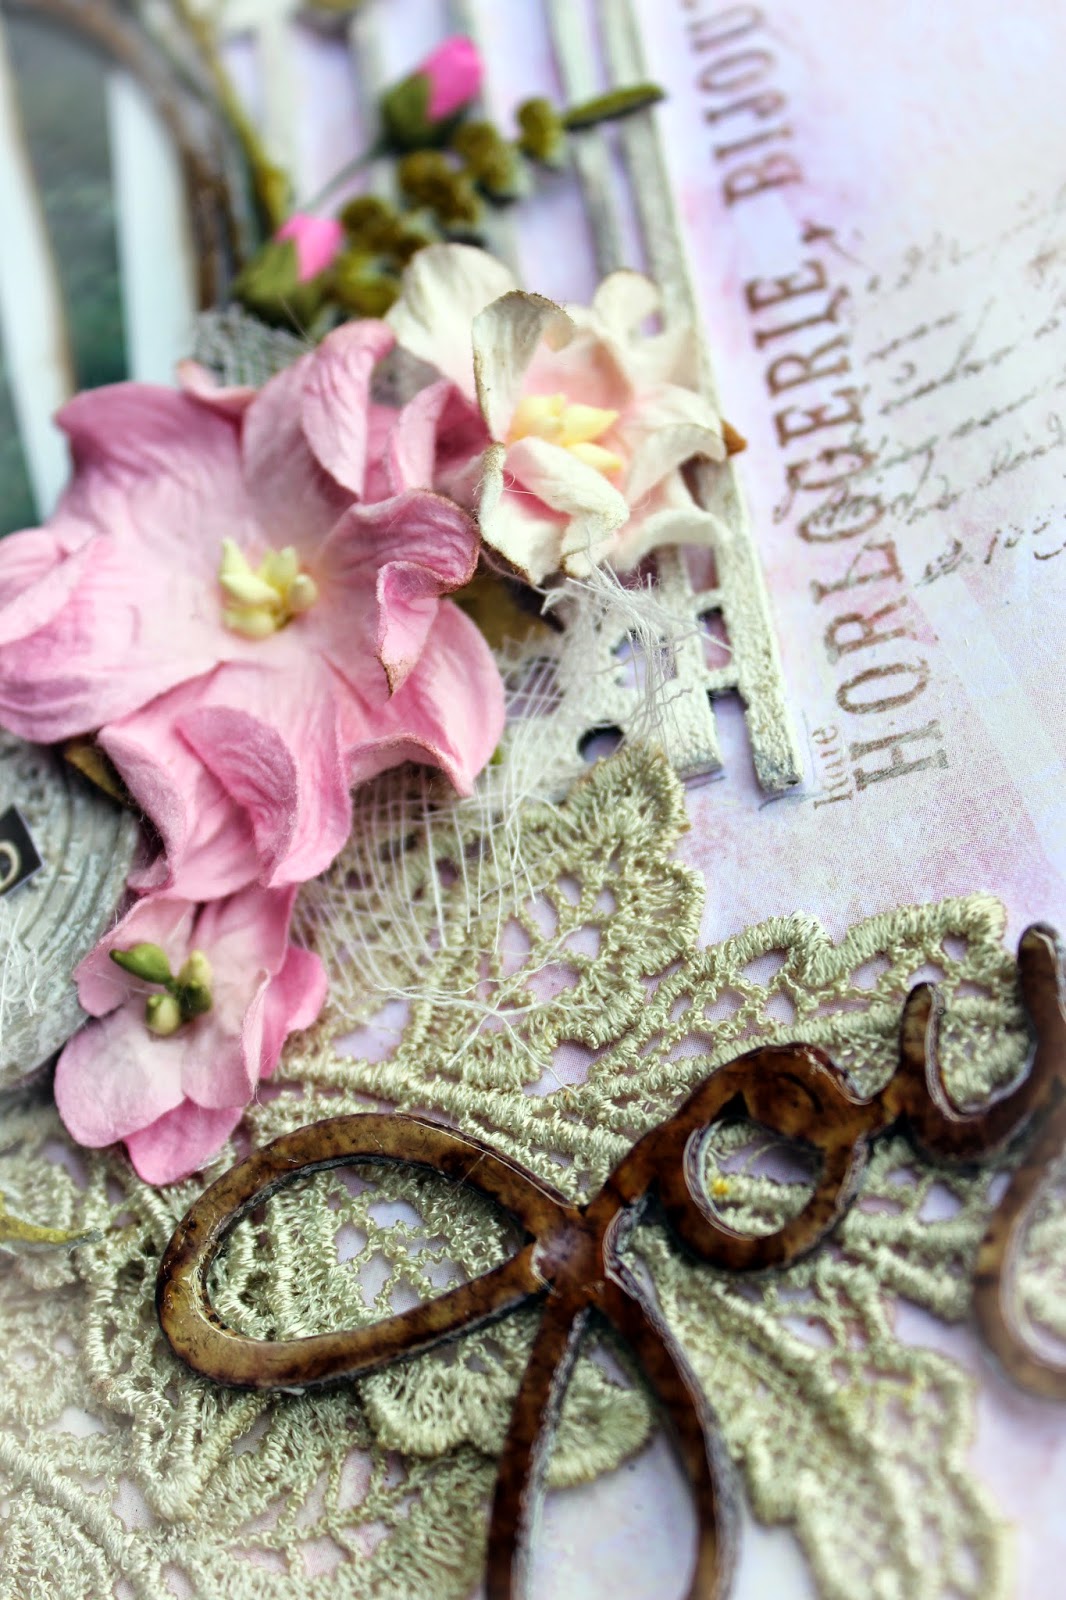
I have also used some Prima goodies including the Birdhouse and Butterfly resins, and the Hello Pastel Prima Flowers. The smaller flat flowers are also Prima which I have added a drop of Liquid Pearls (Buttercup) to the centres. 


Love love love these chipboard flourishes. These have been inked with Distress Inks and covered with dimensional magic! 


The chipboard Princess Window has been inked and painted with Distress Crackle Paint (Picket Fence). Once dry I then again inked it and then gave it another coat this time with Crackle Accents, and then I inked it yet again and wiped away excess with baby wipe!! Time consuming but well worth the outcome.


Beautiful hand dyded lace which is also available from Bella Paperie. This beauty was cut in half down the centre and draped around the heart.


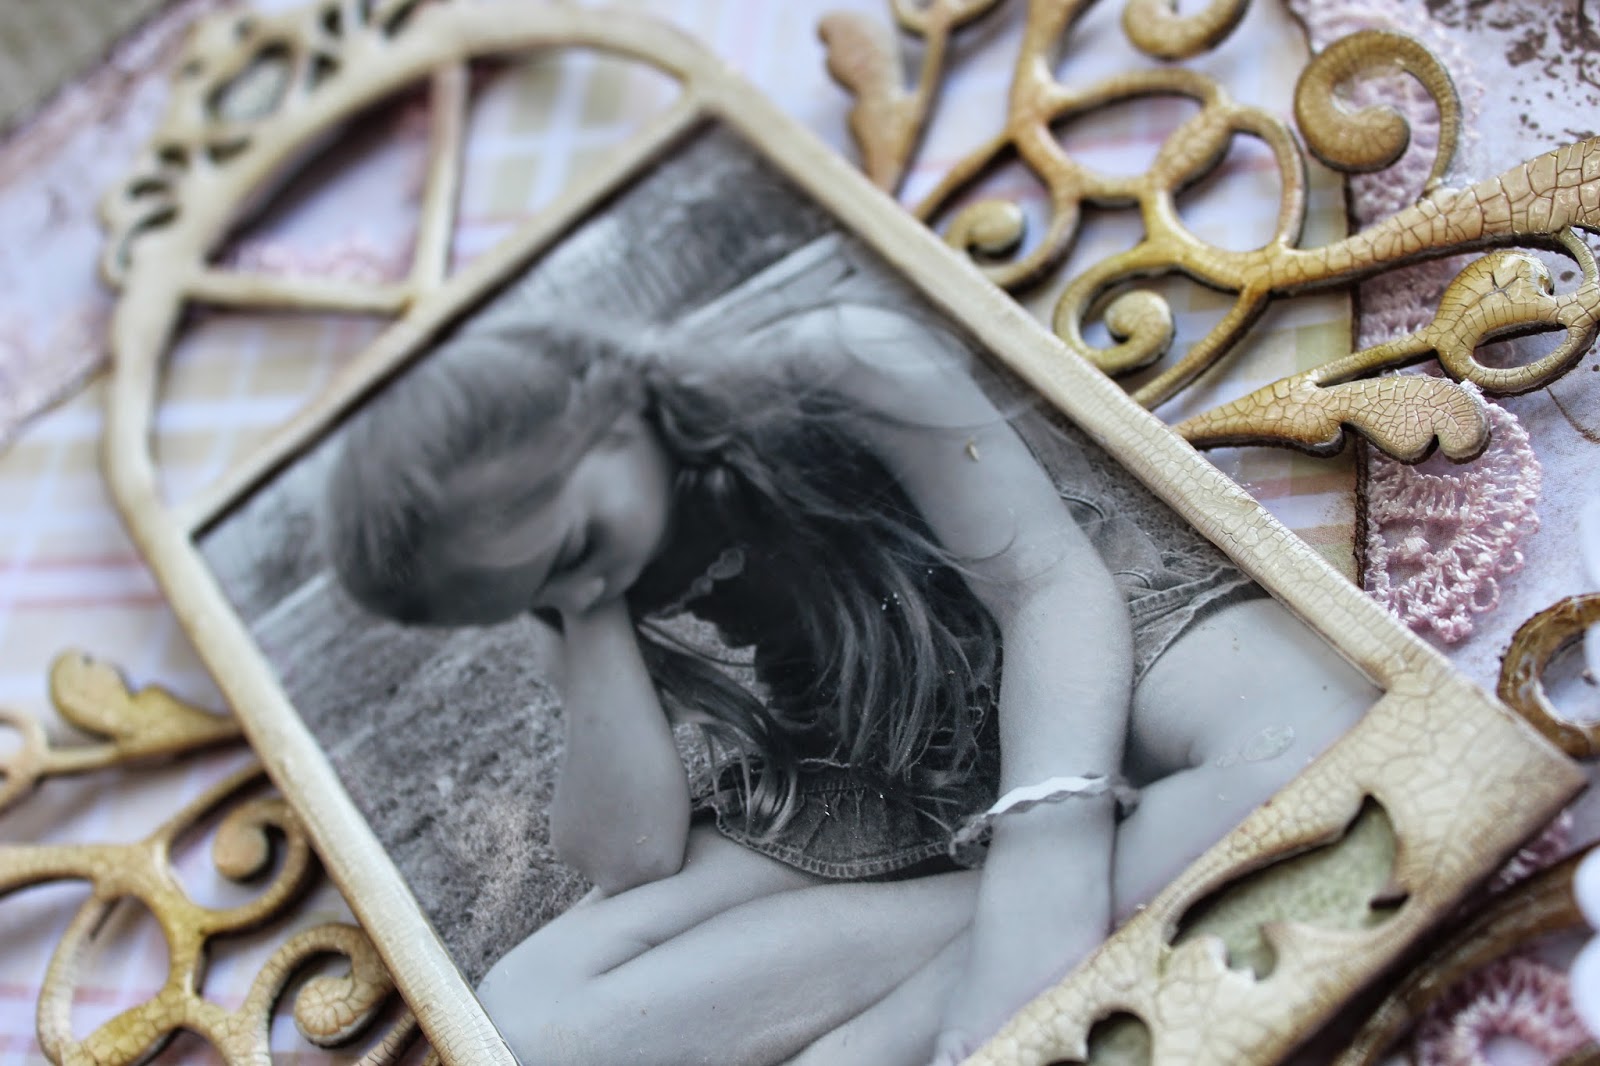
I have used the Symphony Corners as butterfly wings, by turning them on an angle and having them come out from behind the Princess Window. The chippies were treated similarly to the Princess Window but I have used a lot more inking on these. The photo doesn't clearly depict the true colours.


I hope you have enjoyed your visit here. Please don't be shy let me know what you think.

Till next time...

Tina


Materials List:

1 x Chocolate Bazzill
1 x Blue Fern Studio - Boudoir
1 x Blue Fern Studio - Picnic

Blue Fern Studio Chipboards:
  • Princess Window
  • Blooming Flourish
  • Symphony Corners

Prima Resin Butterfly
Prima Resin Birdhouse
Prima Hello Pastel Flowers
Pink Lace
Prima Flat Flowers
Liquid Pearls - Buttercup
Acrylic Stamps - Foliage, Prima Postmark,Script
Distress Inks - Walnut Stain and Forest Moss
Archival Ink - Potting Soil
Gesso, Crackle Accents, Crackle Paint (Picket Fence)


Sunday 22 June 2014

Happiness and Joy are found here.....


Happiness and Joy are found here.....

Yes you heard correctly. This little girl loves nothing better than exploring the world around her, with a bucket at the ready to collect everything and anything. This photo was taken whilst on holiday at my Mother in laws (Hi Barb), beachhouse during the Easter break a few years back . I  remember this bucket coming back to the house full to the brim with every treasure imaginable! 

This layout has been created using the new range of papers and chipboards from Blue Fern Studios now available at Bella Paperie.

I hope you enjoy!


I have fell head over heels in love with these new doily leaves. They of course they have been lovingly dyed by Deb in an arrangement of colours. I of course love the green!


I chose to use an arrangement of flowers from Green Tara and Petaloo.


And of course as always the all important chipboard!!  I have inked this particular one with distress inks and then covered them with a little or if you like a lot of dimensional magic. Makes the chipboard pop off the layout.


And of course no layout is not complete without a little resin. This clock resin is from Prima!


I used some random stamping using Rangers Archival ink Potting Soil! Great colour!

Addition of a little muslin never goes astray! Treated the chippie words with the same technique as mentioned above.


Another close-up


The Chipboard gates were simply given a coat of gesso and randomly inked.

Hope you have enjoyed your visit here. Please let me know what you think. Till next time, take care.

Tina xx


Materials List


Blue Fern Studios - Blue Fern Garden Collection:
Boudoir (991515) and Timeless (991614)
Blue Fern Studios Chipboards: Garden Gate and Circle Flourish Small, Good Vibes.
Doily Leaves
Prima Resin Clock
Petaloo Flowers
Green Tara Camelias
Green Tara Small Rosebuds
Muslin
Kaisercraft Tiny Alphas
Crackle Accents
Distress Inks Walnut Stain and Forest Moss
Dimensional Magic
Gesso
Stamps - Script and Stampers Anonymous Tim Holtz Collection
Ranger Archival Ink


Instructions


  1. Tear Boudoir at top and bottom. Distress heavily. Back with Timeless reverse. Ink edges.
  2. Randomly ink with script and Tim Holtz stamps.
  3. Gesso all chipboards. Ink gates randomly and adhere to layout. Ink words quite heavily and cover with dimensional magic and leave to dry.
  4. Ink edges of three photos and adhere atop of gates
  5. With Circle Flourish colour with distress inks. Cover with a medium layer of dimensional magic. Adhere to the top of photos.
  6. Adorn page with remaining embellishments (lace leaves x 3, flowers, resin, dried words and a little muslin tucked in around page.
  7. Your layout is now complete. Hope you have enjoyed this!


Tuesday 17 June 2014

"The Gentleman's Club"


Welcome back and a big hello. Today I am very excited to share with you my very first layout for the Fabscraps Fabulicious Design Team using The Gentleman's Club Collection. Yay!

This photo has been sitting in my wedding box for so long, so I am also so very happy to be using it. These four men are a big part of my life. Of course my husband (centre) his brother to the left and his best buddy and partner in crime to the right and my gorgeous boy, Hayden sitting on his knee. But boy doesn't time fly so fast. Hayden is soon to turn 15!! 

So scroll on down and see all the close-ups with a materials list and detailed instructions.


Some Close-ups.........


Chipboard title has been covered with liquid pearls (gold pearl) and randomly inked and then covered with crackle accents. Awesome effect for a vintage styled layout.


Used the same technique on the pocket watch which I tucked into the notebook along with some rusted cogs and tickets from Gentleman's Club Journal Book. Lots of nice little bits and pieces in this book.


The notebook was also cut from the Journal Book. I have distressed it and folded it up. Tied a piece of jute around and old button.


Have used a clock sticker from The Gentleman's Club Stickers and adorned it with a cabochon.


This chipboard Hot Air Balloon is just awesome. Covered it also with a precut piece from The Gentleman's Club Journal Book.


Well I hope you have enjoyed this. Let me know what you thought! 
Remember to keep scrolling for the Materials List and Instructions.

Thanks for visiting and I hope to see you again here soon.

Tina


“The Gentleman’s Club” – Tina Ollett

For This Layout You Will Need

·       Fabscraps – The Gentlemen’s Club C66 Collection – C66 066 (Man On Time) x 1, C66 033 (Airships) x 2.
·       Fabscraps Chipboards – DC66010 – DC66 002 – DC66 015
·       Fabscraps Elements – Gentlemen Pictures ST66 002- Gentlemen’s Club Journal Book MC66 001 A
·       Photograph – 5 x 7 inch Landscape
·       Extras cabochon, tea stained muslin, jute, 2 x little cogs, button, rusting powder, liquid pearls ( Gold Pearl) , Distress Ink (Walnut Stain), Crackle Accents.

Instructions:

1.    Distress patterned paper (Man On Time C66 066) and ink with Walnut Stain.

2.    Cut both globes from 1st piece of patterned paper (Airships C66 033). Distress and ink randomly with Walnut Stain. Take the two full sized globes and adhere to (Man On Time C66 066) as shown in layout. Cut another globe down smaller from 2nd piece of (Airships C66 033) and adhere top and bottom of layout.

3.    With remaining Airships patterned paper cut photo mat and adhere sanded photo. Adhere to left side of layout as shown. Cut a corner piece of Airships and adhere behind (Man On Time C66 066) right bottom corner and curl up the top piece and adhere in place.

4.    From Gentlemen’s Club Journal Book carefully cut 3 x tickets, notebook, and clock. Distress all. Adhere clock to bottom right of photo.

5.    Cover chipboard air balloon with matching cut out from Gentlemen’s Club Journal Book. Roughen it up a bit with sandpaper. With the remaining outer chippie from Air Balloon cut to make a border to go around layout. Ink randomly with Walnut Stain ink and cover with Crackle Accents or similar and allow to dry. Adhere to layout.

6.    With Pocket Watch and Title chippie, cover with liquid pearls (Gold Pearl) thinly, allow to dry and randomly cover with Walnut Stain ink. Cover with generous amount of Crackle Accents and allow to dry.

7.    Cover a sticker clock with a cabochon using dimensional magic or similar. Treat cogs with rusting powder and vinegar and allow to dry. Cut both cogs into two pieces once dry.

8.    Adhere down all embellishing elements by firstly starting with muslin, layering it under photo bottom and notebook and around top of Air Balloon. Mount Air Balloon and adhere ensuring it covers the right side of photo. Tuck tickets, pocket watch, and one half cog into Notebook and adhere a button to the front of this tying some jute around button. Adhere to left of photo. Tuck remaining cogs halves in as shown. Lastly adhere down title and cabochon clock which is mounted.

9.    All done! Just frame and hang!


Sunday 8 June 2014

"Reflections"


Today's share is a favourite of mine! Completed a little while ago and recently published in Scrap365!!
When I received the acceptance email from Ali Paris, I had to read and re-read several times to make sure I was seeing correctly. I suppose one never believes in oneself like they should and whilst sending off a few layouts for submission to this awesome mag, I never ever thought that they would be considered  or even published for that fact. So to say the least I was over the moon. And a huge thank you Ali! xx

And so this is a favourite of mine because of the memories it brings about. The photo is of myself and my two younger brothers I think when I was about 9. We don't have a great deal of photos of us as kids so it is especially dear to me.

 Hope you enjoy the details and close-ups below.

"Reflections"


I have used again my favourite range from Prima the "Engraver" Collection.


I used some differing stamps. These birds are from the Kaisercraft acrylic stamps called "Periwinkle". They were all stamped on Luggage tags and fussy cut and mounted.


These gorgeous chippies from Dusty Attic. I simply coated these with Acrylic Antique white and inked randomly with a little Vintage Photo Distress Ink.


The Kaisercraft Wood Flourish Birdcage was dressed similarly. I also added a little lace and a section of the beautiful measuring tape from the Engraver papers. The Memory Maze script word (Moments) was covered with a little Liquid Pearls (Onyx Pearl).


I added some journalling to some hand dyded luggage tags using Kaisercraft Teeny Tiny Alpha Stickers. I dyded these tags using coffee. Loved the end result with the dark splotches.


And lastly my hand made liquid pearl flourishes on acetate which I then fussy cut and glued.

I hope you have enjoyed your visit here and that you have a most beautiful day.

Tina xx

Materials List

Prima Engraver Collection (Atlas, Cartouche, Cessello)
Bazzill Cardstock
Manilla Luggage Tags
Acetate
Dusty Attic Chipboard (Baroque Corners)
Kaisercraft Wood Flourish (Round Birdcage)
Memory Maze Chipboard Word
Liquid Pearls (Onyx Pearl and Chocolate)
Twine
Kaisercraft Acrylic Paint
Kaisercraft Teeny Tiny Alpha Stickers
Kaisercraft Acrylic Stamps
Kaisercraft Paper Blooms (Honey)
Key Charms
Seam Binding
Distress Inks (Vintage Photo, Walnut Stain)


Special Guest

Special Guest
2017