Showing posts with label 12 x 12 Layout. Show all posts

Monday, 31 August 2020

"Fly without wings" 49andMarket Design Team Creation


Hi there friends. I hope this post finds you healthy and happy. 

I am back today to share my latest creation for 49andMarket. I have called this project “Fly without wings”. I hope you enjoy my post today, so without further ado I will give you a little rundown of the products used and my creative process.


As you could well imagine every two weeks choosing from the amazing collections from 49andMarket is no mean feat. I um and ah so much it even annoys me!! So when I started creating this project for today I swapped backwards and forwards with differing collections always coming back to the Vintage Artistry Lilac. Oh how I love this collection. The softness of the papers always bring me back to the shabby vintage style of scrapbooking which I love to create in. 

I started out with the patterned paper “Tranquil”. This is a beautiful piece with a very simplistic background, a little cursive writing on it and touches of imperfections which always makes for a gorgeous backdrop. I added a small amount of interest to the background paper using Crackle Paste and some random stamping with Ethereal Stamp Set and Black Soot distress ink. I also used the piece “Mystique” from the Lilac Collection as well as the backer card of Sweet Reflections to help the lilacs pop a little. The blues and greys in the Sweet Reflections piece does exactly this. So using the Mystique and Sweet Reflections backer card I made lots layers and mats for my gorgeous photo of my daughter from her formal, to sit upon. I also added in ticket elements from the Lilac Ephemera Stack to help with the layers. These stacks are just amazing with a multitude of tones of purple to help with projects.


I added in some other elements too from the cut out sheets of the backer papers which you will always find in the collection packs. I have used the clocks from the Tattered Garden Sheet, and cut them in half to allow them to go further around my layout. These were also layered up on some Dusty Attic Chipboard doilies which added more interest to the clocks. To the clock faces I dressed them with acrylic paint and also a large covering of Dusty Attic Clear Crackle Varnish.


 I have used numerous different collections of flowers from 49andMarket to help with my clustering of flowers. These include the Lavender from the Daisy Stems and the baby Blues from the Sugar Posies Huckleberry collections. With the Fluff from the Sugar Posies collection I used some in white and some I coloured using a mix of white gesso with some Acrylic Paint in Sugar Plum. This gave me a gentler pinkish colour.


 Daisy Stem Lavender


Serendiptious Layered Embellishments


Star Dust Stickles


As you will notice I added in many more chipboards pieces to help frame my photo. Also I added in some laces cut into pieces. The butterflies are from the older collection of 49andMarket’s layered embellishments. The blue leaves were from the Serendipitous collection of layered embellishments. I chose the title name from the barcode strip of the Irrevocable Beauty “Petrarch” paper...... “Fly without wings”. Finishing up my project I added in some pretty flower pearls with mat gel and some Star Dust Stickles over my flower stamens and butterflies and little birds.


Well that is all from me today. I do hope you have enjoyed my blog post. 


Take care and until next time happy crafting.


Tina x


Products Used:


Vintage Artistry Lilac “Tranquil” 

Vintage Artistry Lilac “Mystique” 

Vintage Artistry Lilac Ephemera Stack 

Irrevocable Beauty – Petrarch 

Sweet Reflections Backer Card -

Tattered Gardens Backer Card -

Sugar Posies “Fluff” 

Sugar Posies “Blue Raspberry” 

Daisy Stems “Lavender”

Garden Seeds “Cotton”

Gabi’s Ethereal Stamp Set 

Serendipitous Layered Embellishments 


Other Products Used:


Assortment of Dusty Attic Chipboard packs

Dusty Attic Acrylic Paint Sugar Plum

Dusty Attic Clear Crackle Varnish

Liquitex Clear Gesso

Liquitex White Gesso

3-D Mat Gel

Tim Holtz Distress Ink Black Soot

Couture Creations Stencil  - Pavers

Dress My Craft Flower Pearls

Ranger Texture Paste

Ranger Star Dust Stickles

Acrylic Paint Rainy Day

Muslin

Friday, 31 July 2020

"Beachy" 49andMarket Design Team Creation

Hi there crafty friends. So glad to see you back here joining me today with my newest creation for 49andMarket.
This project I have titled “Beachy”.


I am so very lucky to have received the latest new release collection of Vintage Artistry Shore just in time for this blogpost. I cannot tell you how much this collection means to me. It is quite often that we see the beach collections using the blues and browns, but very rarely does it branch out into the greens of the deep oceans and reds of the corals that we have everywhere here in our beautiful barrier reef. So I was more than happy to see these colours being used for this collection. 

I did some digging to find the perfect photo as I always do and I can tell you it took me longer to choose a photo ( of which I had so many that co-ordinated perfectly) than it did to create the layout. Crazy stuff ! But I was so very happy when my oldest daughter gave me a helping hand to choose. It really made the decision making so much easier.
 
We decided on this photo of my son who will turn 21 in the upcoming week. When the children were younger the beach was where we spent a lot of time. These days not so much, but back then it was regular visits to our favourite spots. And digging was a huge part of our time spent on the beach.


So for my project today I decided to do something without flowers and to concentrate on embellishing with the fabulous laser cut elements from the collection pack. I used Triton’s Shell from the 12 x 12 Collection pack. I love this piece. The detail is amazing. I primed it with clear gesso firstly then added in a small amount of crackle paste texture through a Dusty Attic Fishnet Stencil. I also added a little of the crackle in freehand for more texture. When this was dry I made
a mix of water with Distress Ink Rusty Hinge and painted over some of the stark whiteness to dull it down a little.

 
I made layers with the Cover page of Vintage Artistry Shore using both sides of the paper. These pieces were heavily distressed and layered up with lots of dimension using old chipboard in between some of the layers. Once I adhered this to my background page I added in some distressed pieces of the 49andMarket Burlap netting. This I find to be the best to distress. I also add a little crackle over this  and then sprinkled on some art stones and also some decorative sand that I picked up at the dollar store. 
This actually looks like sand so it was a great find. Once I had the basics down
I went to work on embellishing with the Laser Cut sheets from the collection. There are two 12 x 12 sheets in each of these collections. So much to choose from. It makes it hard to decide. I added in the plants and also some of the fish which I though were just so cute. I also added in a few of the shells.

 
Lastly I added in some stamping using the stamp set from the same collection. I chose the word “Beach” which I used down the right side of the layout for my title. I also added in some random stamping of different shells around the project. I further coloured my project with more gesso and Rusty Hinge Distress Ink.


Well that is me for another blog post. I hope you enjoyed seeing the new collection and my project inspired by all of these fabulous new release products. Until next time take care and happy crafting.
 
Tina Marie – forever&always ...


49andMarket Products used:
 
 
Other Products Used
 
Tim Holtz Distress Ink Rusty Hinge
Finnabair Art Ingredients Art Stones in varying sizes https://tinamarie.com.au/product/finnabair-art-ingredients-mini-art-stones/

Decorative Sand

Wednesday, 8 April 2020

"The good life" Dusty Attic Moodboard Inspiration Creation

Welcome back to the blog here tonight. I hope this post finds you healthy and safe at home. This last week has found me creating a little more than usual which I am loving. So when I awoke this morning I thought to do the moodboard for Dusty Attic. Oh I love these colours, but I do struggle with them a little. Dark colours are really not my best works but I really loved how it worked out and I hope you like it too.


The moodboard below for my wonderful inspiration. Don't forget you have up until the end of the month to submit and entry to be in the running for some fabulous Dusty Attic Chipboards. Just complete a project incorporating a few pieces of Dusty Attic and upload to the Dusty Attic Blog sidebar.


I have used a few sheets of 49andMarket papers and tore strips of black papers to sit at either side of the base paper. I made the edges look more dimensional by adding a couple of layers of the torn papers whilst tucking in some gorgeous new Fancy Trims. I have used Fancy Trims #13 and #16 for this project.

Fancy Trim #13

Fancy Trim #16

I dressed the #13 trim in black ink along with a mix of BrownGold Inka Gold and Couture Creations Copper Pigment Powder. The #16 trim was primed in clear gesso and then dressed with the Copper Pigment Powder.


I then cut some photo mats for my 4 x 6 inch portrait colour photo to sit upon. These have been popped up on some old chipboard leftovers and distressed around the edges a little. I have used some postcards from 49andMarket along with the leftover black patterned paper that I used for the torn edges. These were all adhered together and adhered to the middle or close enough to the middle of my layout. I added in some texture around the photo mattings using the Dusty Attic Glass Stain Stencil with some Paper Texture Paste. When this dried I inked over the texture with a Black Soot Distress Ink. 


I decided a little later on that I wanted to add the leftover pieces of the fancy trim. These pieces were added in around the photo edges to help highlight the photo a little more. I then added some Laser Cut clocks from 49andMarket to the inner sections of the ATC frames. These frames were primed with white gesso and inked and finally a layer of Dusty Attic Crackle Varnish was added over the top. On the edges I sprinkled a little Stampendous Crush Glass in Black and Bronze over the varnish and allowed it to dry. You can see these in the photo below. 


After some time I decided that I still didn't have enough Dusty goodness so I added in the gorgeous and of course my all time favourite Baroque frame. This was dressed in black ink and pigments also. To fit it I just cut it in one section and threaded through and around the photo and layers. 


Baroque Frame Set


I moved on to the finishing touches adding in a couple of more pieces of Dusty that were sitting on my desk just waiting to be used. I included the new release paw prints which you can see at the top right of the layout. I dressed these simarly to the Baroque frame. I also used a cut piece of the 6 inch skeleton clock and the title tab "the good life" which was added to the right side of the photo.


Paw Prints - Dog

Skeleton Clock face

Mini Tabs #5 Black

Below here is a little sneak at the gorgeous doggie paw prints. I just couldn't not include them in my project. 


To complete my project I had included lots of gorgeous collections of flowers from 49andMarket. Some newer and some older collections. I added in some gorgeous Crush Glass in Bronze and Black over the flowers to help them pop a little more. I also added in some stamping with the use of embossing powders and also some inks. 

Well that is all from me today. I hope you have found some inspiration from my project here today to give the moodboard a go yourself. Would love to see some new faces this month too. 

Until next time stay safe and happy crafting. 

Tina x

Tuesday, 3 March 2020

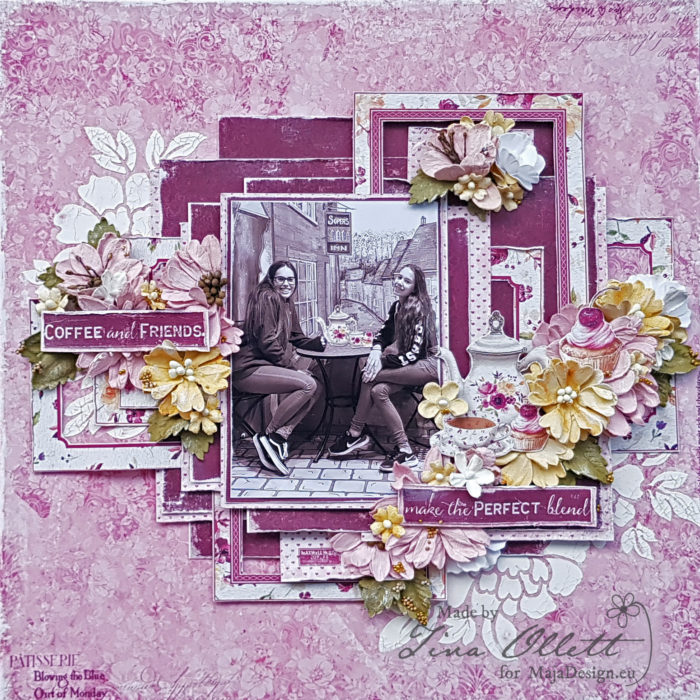
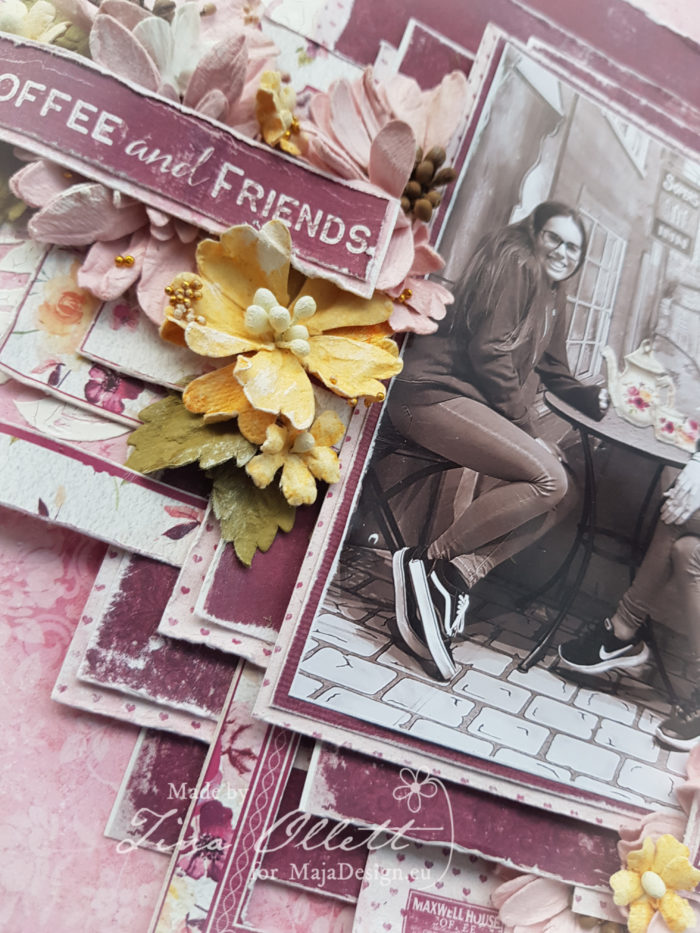
"Coffee and Friends make the perfect blend" - Maja Design Team project

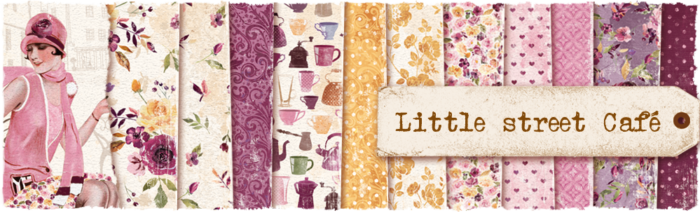
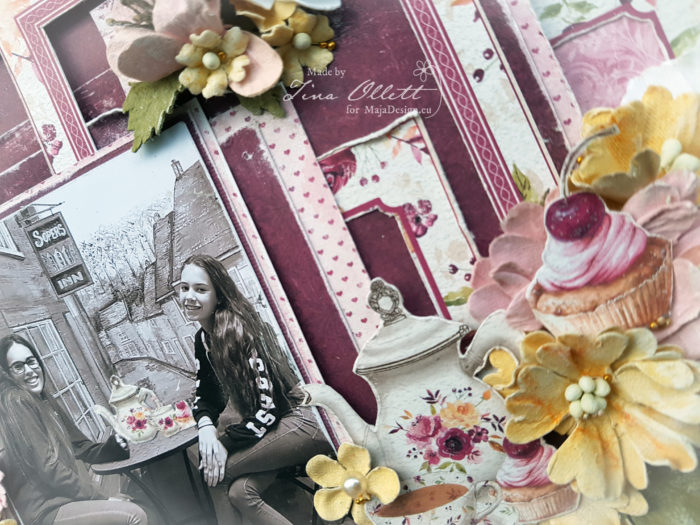
Welcome and a warm welcome Maja Design friends. Tina Ollett with you here today to share a project created with the gorgeous new release "Little street Cafe'". This is titled "Coffee and Friends".


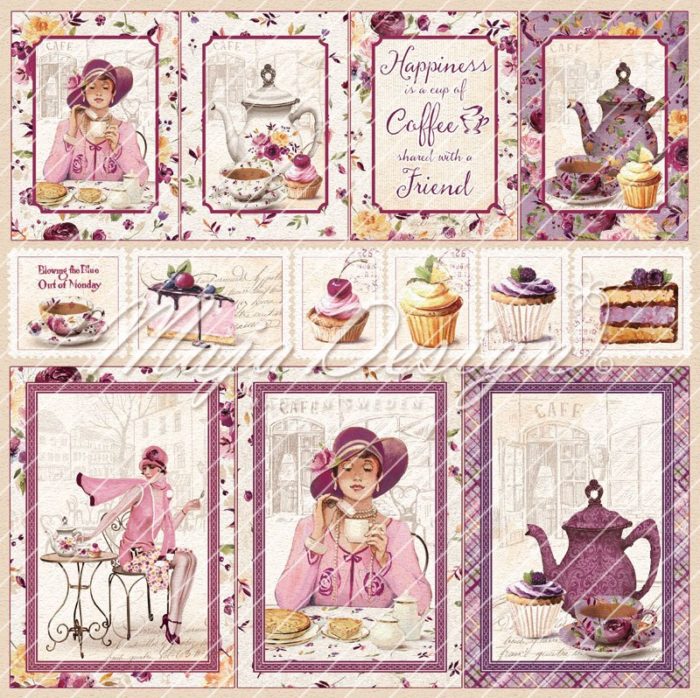
The cute little sentiment that I used to title my project I found on the tear off strips of the patterned papers. This was actually my starting point When I saw this I knew exactly what photo I wanted to use. Our trip to New Zealand a couple of years ago found my girls posing for photos in lots of different settings. This of course was just a backdrop but a perfect setting for a photo. When I looked closely at the Die Cut sheet from this collection I saw that some of the cards had a similar background work. What a great coincidence don't you think.
You can see oh so beautiful Die Cut sheet below.


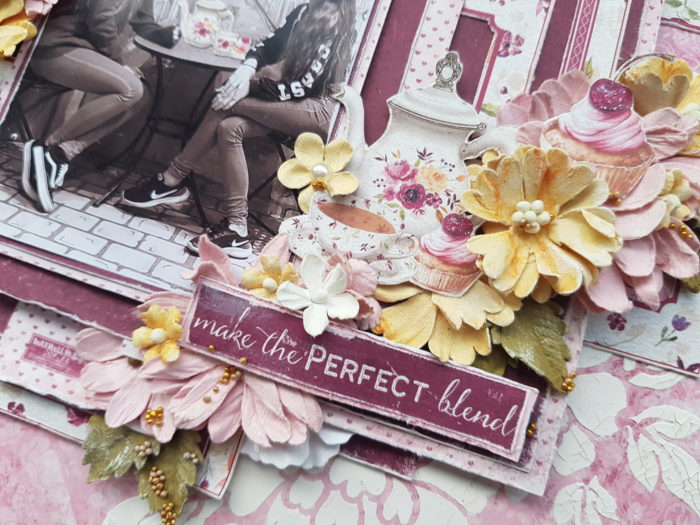
 I cut the die cut sheet using the frames from each card. I also cut a cute cupcake and also the mini mini teapot with cup and sat it on the table in the middle of the girls. You can see it below. Soooo cute! I also cut the larger tea set and popped it up on 3D foam.


I have used the patterned sheet "Something Sweet" as my background piece. I used a Dusty Attic stencil with some Crackle paste to add texture and some added detail to the background. I wanted to keep the page fairly clean so I decided to use a lot of  layering using the papers. I have also used papers from the 6 x 6 pack so there was very little trimming needed for the page. These pieces were distressed sanded and layered alternatively.


Something Sweet

  
Meeting Friends
                                                                                         
I 
also add in some pretty 49andMarket flowers and some flower pearls to help embellish my layout amongst the fussy cut pieces from the Die Cut sheet that you can see below.


That is all that I really did. Quite a simple yet pretty layout full of layers and gorgeous colour.
I hope you enjoyed this post. Let me know what you think. Until next time happy crafting.

Special Guest

Special Guest
2017