Wednesday 19 November 2014

"Adore"

Hi everyone....today I am sharing a layout that was recently published in Australian Scrapbooking Memories magazine. Was so excited to see this one in print, as it is only my first of my mixed media creations to be accepted for publishing. Predominately a paper scrapper, I am slowly experimenting with some mixed media. I love to use stencils with texture pastes but mostly I love the dripping of mists, inks and paints.


I have called this creation "Adore".


You can see here that I am still loving to use Crackle Paint. Just love the finish of Crackle Paint over inks. Gives the layout another layer of dimension and texture. Some stamping too!


Some beautiful Prima flowers and of course a resin!!


This layout is full of chippes. Some of them I have made myself with Dies and dressed them up.


And of course a bit of chipboard......these little beauties are from Memory Maze.(Chicken Wire, Vintage Frame and Heart) and the chipboard word is from a Dusty Attic collection pack.


Dripping paint ohhhhhhhh la la, so lovely.

I hope you have liked this layout I have shared here today. 
Take care until next time and happy scrapping.

Tina xx

Sunday 9 November 2014

"Love you Always"

Hello again. Hope you are having a great day!! Today I am sharing another Design Team creation for Fabscraps. It is the second of my creations using Royal Baby. This collection I think has something for everyone. Those that know me well know that I love to create shabby chic/ vintage. But this time I have changed it up a notch. Shocked....... I suppose I was a little when I finished this. It is a very clean but I suppose pretty page. Lots of hand-sewing!! I always like to add some degree of difficulty to my creations and goodness know why I am so time deprived!! I think I like to drag the creativity time out!! I do spend a lot of time sitting and waiting for my 3 children at after-school activities so it helps fill in my time. 
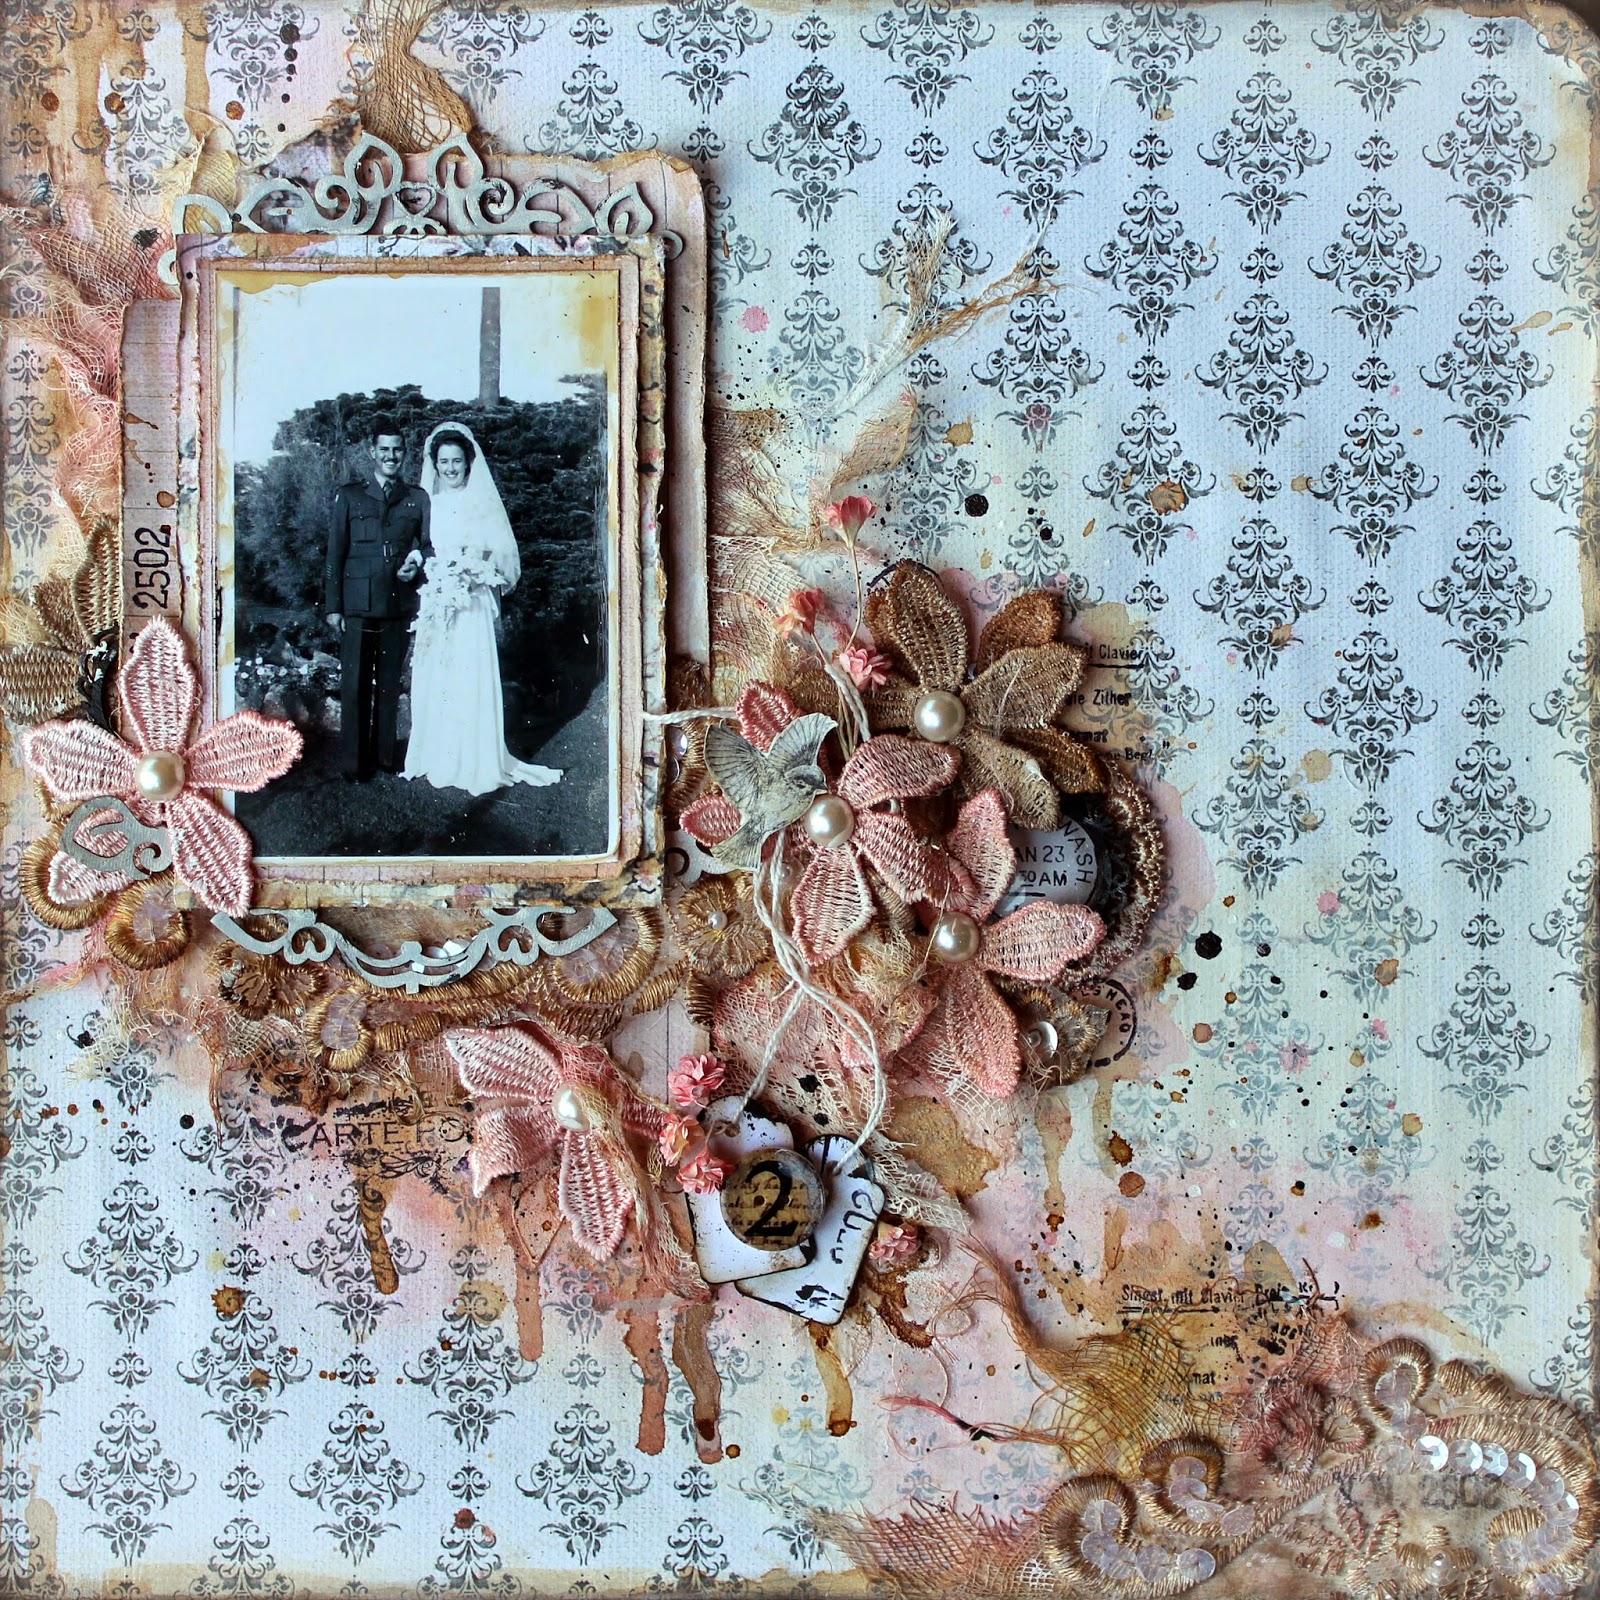
So okay, this layout was scrapped using a fave photo that my little sis actually took the day my eldest daughter came home from the hospital. I remember so clearly the day before, my then 18month old son - Hayden declared to all and sundry that she would not be coming home with us. So when we got home this is the first thing he wanted to do.....yes give her lots of cuddles!! So precious.


"Love you Always"


The base paper has been punched an embroidered and I have used a lot of embossing on this layout.


The cloud chipboards in this collection are really so cute. In this chipboard pack you will find raindrops to go with the clouds.....but I wanted to change it up a little and have the clouds raining hearts so I made these little hearts using a stencil!! I was a little surprised when it worked out. I will share this with you in the instructions below.


The teddy's in this range are just adorable...gives this layout a cuteness factor! And again the measuring tapes....I think I have a thing about them...looooooooooove them.
 I have used a sizzix die to cute the chipboard word Love. This has also been powder embossed.

I have included a materials list and detailed instructions below......keep scrolling for these.

Well I hope you have enjoyed this today. If you have any questions at all you can message me on my facebook account or just leave a message here.

Until next time....happy scrapping. 

Tina x


Materials List


Fabscraps - Royal Baby Collection
1 x Royal Teddy C70 004
1 x Baby Books C70 003
Fabscraps Cloud Tags and Scalloped Round Tag DC70 010
Fabscraps Royal Baby Collection Journal (measuring tape)
Grey Cardstock
Peach cardstock
Martha Stewart - Around the Page Punch (Cherish)
Sizzix Die - Love
Various Acrylic Stamps
Thick Gesso
Texture Paste
Stencil (Heart)
Archival Ink - Watering Can
Embossing Powders (Silver, Peach and White)
Embroidery Thread
Embroidery Needle
Embellishing Flowers and leaves

Instructions

  1. Take grey cardstock base and from the centre cut a 10cm x 14cm photo mat. Distress this and also the outside of what will be your base. Cut a 8.1cm x 12cm photo mat from the peach cardstock and distress. Adhere the photo atop of this.
  2. Take paper titled "Baby Books" and trim. Ensure that it measures exactly 12 inches x 12 inches. Use punch around the page punch of your choice or Cherish. From the centre of this cut a 13.8cm x 9.8cm photo mat and distress.
  3. Embroider the framework and distress edge lightly. Adhere framework to distressed Grey Cardstock base.
  4. Take paper titled Royal Teddy and Trim 3.5cm from top and 3.5cm from one side.Keep the strips for later. Distress square and adhere to the centre of the base. Emboss frameworks and flourishes as shown in layout with either silver or white powders. In all I have stamped 3 oval frames and 3 flourishes.
  5. Cut out grey measuring tapes from journal book.
  6. With the remaining strips from Royal Teddy cut a teddy out and with the other cut into 12.7cm strips (3). Start building your matting for photo. Grey photo mat...baby books....royal teddy strips....and peach photo mat with photo. Once together adhere to the right top of layout as shown. Tuck in a cut up measuring tape to the right of photo matting. Another to top right of layout and two coming out from left embossed framework. Curl ends on one of these.
  7. Take your cloud chippies and cover thickly with gesso trying to leave peaks of texture. Leave overnight to dry. Ink randomly with little archival potting mix. Also add a little silver embossing powder and heat set. Adhere these two clouds as shown in layout.
  8. Title: Cut a title using chipboard. Emboss with peach coloured powder.
  9. Heart Embellishments: to make these use an old piece of cardstock. Lay a heart stencil over the top and wipe over a good thickness of texture paste. Remove stencil and sprinkle silver embossing powder and shake off excess. Leave to dry a while but while still a little wet heat set. It will bubble a lot but this is okay. Leave to dry for a while and then cut the heart from the cardstock and there you have your own little homemade hearts. I did a couple of large hearts with some white embossing powders.
  10. Dry brush your flowers with some white gesso to dull them down a little. and now you can start embellishing your page with all the pretties. Don't forget to add the little royal teddy....he is so cute!!!
  11. You are now finished just frame and hang!!


Monday 3 November 2014

"2"

Hi there and a very warm welcome to you. Thanks for popping bye today. I have a special share for you today. It has been so long since I have done a vintage layout and I have been bursting at the seams to do one ever since my MIL passed on some most wonderful photos of family. I must admit that I don't know who most of these people are but I am learning quickly! So today is a wedding photo of my husbands Grandmothers sister....Dorothy. She was such a stunning woman. I am unsure where abouts the photo was taken but be assured it is on my list of questions to ask.

So this layout was completed using Fabscraps "Elegant Chic"and yes I know you have heard it all before but these paper and chipboards are just divine. This is my fourth layout and I am on my fifth at present. It is sitting on my table half finished. I have dabbled in some mixed media for this layout bringing out the gesso and misting sprays, but I have mostly used coffee on this with lots of lace and trims that I have dyed using my mists and coffee. I hope you enjoy this as much as I did creating it.


 I have titled this one "2".


For this layout I have used lots of coffee to stain the layout with drips and splatters. The flower trim that you can see above have all been dyed with either coffee or mists. I have used Vintage Pink here.....beautiful colour to co-ordinate with coffee and black. I have also used a little Sunflower (yellow) mist here and there.


Along with the lace motif and flower trim I have included some cheesecloth and mini lace doilies.


The Fabscraps chipboard used here is a piece called Elegant Chic. I have simply cut this piece in half and cut out the wording from the centre, gessoed and ink it and adhered it top and bottom of photo.
Keep scrolling for a product list and full detailed instuctions.

Well that's all from me, I hope you have enjoyed this layout and I hope to see you here again soon.

Tina x


Products Used

Fabscraps Fleur C71 007 x1
Fabscraps Flying Bird C71 006 x 1
Fabscraps Shabby Flowers C71 005
Fabscraps DC71 005 Elegant Chic Chipboard
Lace and Sequinned Motif 
Mini Doily
Cheesecloth
Clear and White Gesso
Mists (Vintage Pink, Sunflower)
Coffee
Stencil
Impasto Medium
Various Acrylic Stamps
Flat Pearls
Prima Flower Trim
Miscellaneous Flower Sprays
Prima Button and Frame
Archival Ink - Jet Black
Distress Inks Pumice Stone / Walnut Stain / Antique Linen and Black Soot
Cabichon
Price Tags

Instructions:

  1. Take Fabscraps "Fleur" patterned paper and adhere to a sturdy background ( I have used Chipboard for this). Coat base paper with clear gesso and heat set. Run a brush of cooled coffee around the outside of base paper and again heat set. Ink edges of base paper with Black Soot distress ink. Soften a section of your patterned paper running from top left to bottom right of layout using a sponge and white gesso. Wipe off excess with a baby wipe whilst blending. Do some stenciling with impasto and heat set. Run a piece of cheesecloth from the left hand top to the right hand bottom of your layout. Cut a section out at about 3/4 of the way as shown in layout. Secure with Gel Medium and heat set.
  2. Using misting sprays and ready-made precooled coffee colour your background. Apply some stamping randomly around the layout with Jet Black Archival ink. 
  3. Take a lace motif and dip into your coffee. I washed mine off  with a little water afterwards so it wasn't too dark. Dry and cut a section out to sit at the right bottom corner of layout. Adhere ontop of the cheesecloth.
  4. Cut from remaining Fabscraps patterned papers of Flying Bird and Shabby Flowers matting pieces to sit your photo on. I have cut 4 differing sized pieces Distressed each and run a brush of coffee around each and secured them behind the photo using mounting foam. Adhere to top left of layout as shown. Tuck in remaining motif piece at base.
  5. Prepare chipboard by coating with gesso (White). Heat set and ink with Pumice Stone Distress ink to give and off white colour. Cut in two and cut words from the centre. Adhere one piece at the top of the photo and one at the base of the photo as shown.
  6. Mist Flower Trims  and smaller flower sprays and dry each. Adhere to layout as shown. Adhere pearl centres to each flower trim. Tuck in a mini doily and adorn with a cabichon  and frame at right of photo. Fussy cut flying bird ink with a little Antique Linen Distress Ink  and mount atop of flowers at right of photo.
  7. Ink edges of a couple of pricing tags with black ink and also a little walnut stain distress ink. Wrap string from tags around flower cluster and let drop down. Adhere where it falls. Adorn the tags with a wood button. This is my title "2".
  8. Finish off with splatters of black ink and coffee and heat set.
  9. Your layout is now ready to frame and hang!!


Special Guest

Special Guest
2017