Wednesday 29 June 2016

"Untitled" Dusty Attic June Project - Tina Ollett

A very warm welcome to you.
Today I have my Design Team project for June......a little late but nevertheless I got here.
My inspiration for my project this month is my gorgeous girl, Ashlea. As always when I am rummaging through my photos I happen upon one that I may have overlooked or was just simply keeping for that special project. This was a photo taken down at Scarborough last year in the school holidays. 

I started off with a simple piece of 12 x 12 inch heavy chipboard to make this layout my own. I wanted to give my layout a whitewash look, so I coated the board with gesso and then wiped off the excess. I did this a couple of times to get the desired effect. 

Image 1 Image 1

Once my background whitewash was dried I then did some dry brush painting I guess you could call it. I diluted down both the Oceania and Gingernut Dusty In Colour acrylic paints and then wiped the excess off my paintbrush. I used the photo as a guide to show where the sky meets the water.


All my gorgeous Dusty Attic pieces were primed with gesso firstly. The new release #5 Frame was treated firstly with a generous coating of Dusty Attic Texture Paste and left to dry. When it was completely dried I rubbed over the entire frame with some Colour Blast Colour Paste (Leather) and wiped the excess off with a baby wipe. 


And here you can see the little Sea Horse at the right. This was taken from the Dusty Attic Mini Shells pack....it is just too cute!


I love to used bits and pieces that I find on the beaches when we are there. Last time we (my girls and I love to beach-comb), were fortunate enough to have found some awesome sea sponges which I have used in my flower cluster along with some gorgeous little and big shells found to add to the page.


Sitting behind the Compass Rose you can see a circle. These chippies were the centres of the Bubbles chipboards. I used 4 or 5 of these scattered around the page in differing sizes. They were covered with Dusty Attic Texture Paste and Mica Powder (Rust).


Well that is all from me today. Don't forget to keep scrolling if you are looking for a complete materials list of this project or maybe just a Dusty piece that you are interested in. They are below and can be purchased direct from the Dusty Attic.


Until next time........happy scrapping.
Tina x

Design Team Member 2016


Materials List

Image 1 Image 1 Image 1

Dusty Attic Anchors - DA0558
Dusty Attic Compass Rose - DA0686
Dusty Attic Seagrass Large - DA1103

Image 1  

 Dusty Attic Fish Net Panel - DA0654
Dusty Attic Bubbles - DA1509
Dusty Attic New Release Frame 5
                                                         
 Dusty Attic Mini Shells - DA0559

  Image 1
Dusty Attic Texture Paste

Colour Blast Paste - Leather
Dusty In Colour Oceania
Dusty In Colour Gingernut
Liquitex Gesso
Finnabair Artingredients Mica Powder - Rust
Glimmermist Tattered Leather
Prima Marketing Small Art Stones
Prima Marketing Flowers (French Riviera 586188 and French Riviera 586225 and Royal Menagerie Diana 655350583354)
Wild Orchid Lillies
Glimmermist Tattered Leather
Cheesecloth
Shells and Seasponge
Glitter Glass - Bronze


Wednesday 15 June 2016

"Memories" - 49andMarket - Flower Fairies of Spring


Welcome. For you today I have my newest creation for 49andMarket. 
This time around I have been so very fortunate to use the absolutely enchanting and magical 
Flower Fairies of Spring. It has been an tremendous joy to use this collection. 

I have titled this "Memories"


This photo is an absolute favourite for me. My youngest throwing a tantie. This is one of a sequence of photos I took of her having a moment in life where she thought she has been unfairly done by. It is so sweet to look back on photos like these just to remind me of how far we have all come and where we once were.


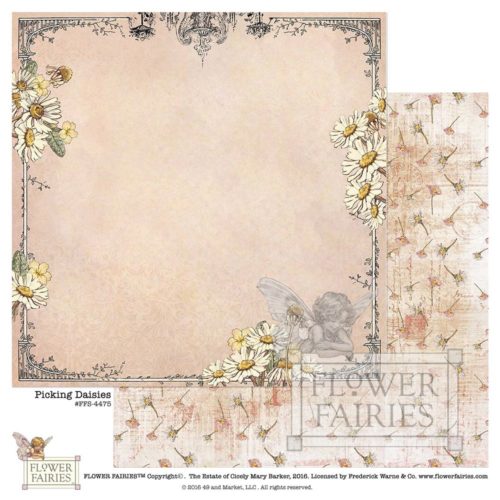
I have been so very spoilt and I feel very privileged to be able to work with 49andMarket's stunning products. Fussy cutting these beautiful papers was a dream to do. These papers have a wonderful sturdiness to them that allows for easy cutting with a craft knife or scissors. The framework you can see around the photo has been cut from the outer section of the second piece of "Picking Daisies" patterned paper. This is very intricate but it was quite easy to cut. I cut it down smaller to fit my 4 x 6 inch photo.


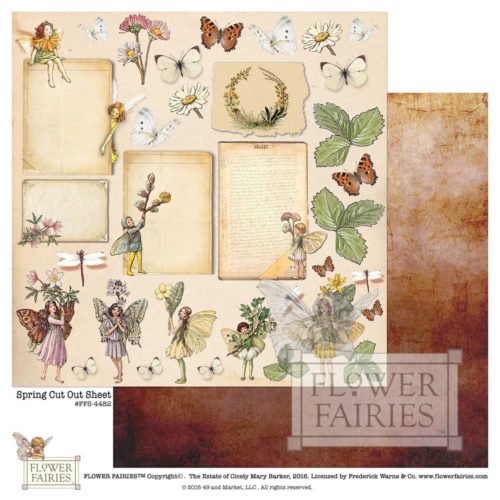
Most of the elements you can see above have been cut from the Spring Cut Out Sheet. They have all been layered around the photo leaving it the focal point of my layout.


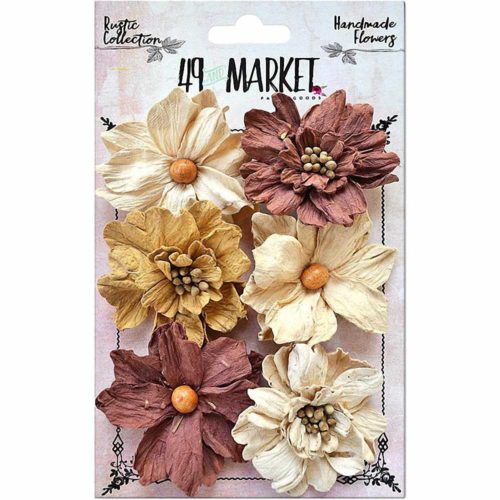
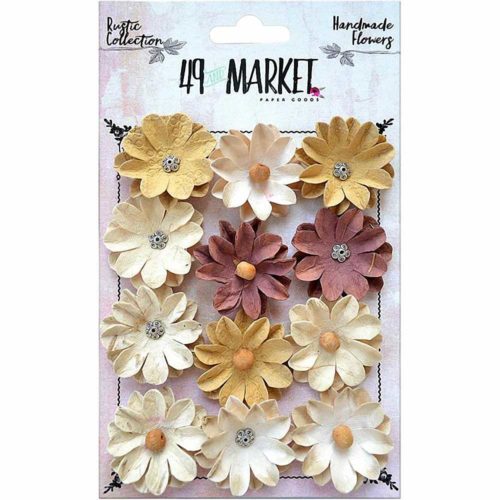
And omygosh I am in loooooove with these the Rustic Barn Blooms. They are simply beautiful. I added a little of I'm Amazed Prills to help the blooms pop a little more.


I have also added in a couple of my favourite Dusty Attic chippies. The elegant scroll has been dressed in Liquid Pearls and gesso. And the title was inked and top dressed with Glossy Accents.


These Spring Fairies as just gorgeous. On each of the three fairies I added in some Ranger Star Dust Stickles to their wings. I also added the Star Dust Stickles to the outside framework of the page and the photo frame.


Well that is all I have for you today. I so hope you enjoyed your visit here to my blog.
Until next time happy scrapping!


Tina O xxx


Materials Used


49andMarket - Flower Fairies of Spring - Spring Cut Out Sheet

FF Spring Cut Out Sheet FFS 4482

49andMarket - Flower Fairies of Spring - Picking Daisies x 2 Sheets

FF PIcking Daisies FFS 4475

49andMarket -  Rustic Barn Medium Blooms

Rustic Barn Medium Blooms RB 84321

49andMarket - Rustic Barn Small Blooms

Rustic Barn Small Blooms RB 84338

Dusty Attic Elegant Swirls #13
Dusty Attic Word Pack #17
Dusty Attic Mini Clocks
Liquid Pearls - Bisque
Liquitex Clear Gesso, Gesso and Texture Paste
Tim Holtz Distress Crackle Paint - Clear Rock Candy
Tim Holtz Collection Gothic Stencil THS026
Helmar Clear Drying Glue
Prills - I'm Amazed
Ranger Star Dust Stickles
Lindy's Stamp Gang - Golden Angel Wings
Distress Ink Aged Mahogany

Tuesday 7 June 2016

"Loved" Dusty Attic / The Scrapbook Store Design Team Creation

A very big hello to you and welcome to my blog.
And also a huge thank you for making the visit here, I truly appreciate it.
Today I have my Dusty Attic Design Team Creation. The Dusty Attic's Moodboard this month is another stunner.......see below.


My first immediate thought was to do a beachy layout, but then only moments later the Postman arrived with my wonderful parcel of goodies from Suzanne at The Scrapbook Store! 
Okay so are you ready.......Maja Design ...........Vintage Romance......need I say more!

My interpretation of the moodboard.....

"Loved"

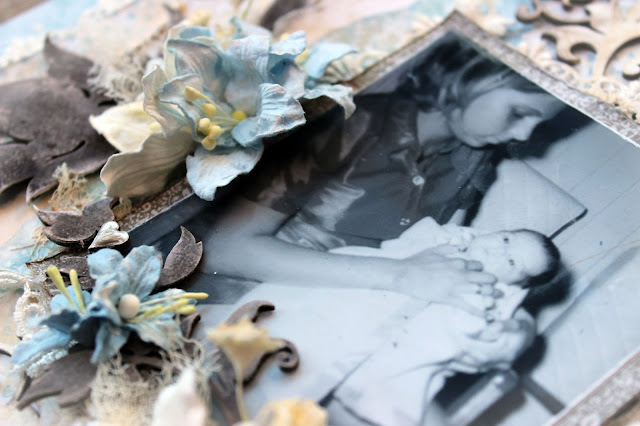
I know that Vintage Styled layouts are not everyone's cup of tea, but every now and again I love to get back to where I first started. And this photo is defintely not a vintage although I do feel a little that way some days...hehehehhe! This is a photo of my Mum holding little ol me .....1971.
There are very little photos of me this little and even less of Mum.....so this is a very very precious photo. One that has been awaiting to be used for such a long long time.


I started out by gutting my first piece of Vintage Romance (Happily Ever After) and then using the gutted reverse I tore sections and layered them over the framework of Happily Ever After and Champagne.


My beautiful Dusty pieces........well I have used a few of my all time favourites here and a new one which I just can't get enough of. It is the Ornament Trim #2......omygoodness.......it just screams elegance wouldn't you agree? When I was playing with this piece I decided to cut the middle section out and save it for a rainy day......but I then saw the heart section in the middle of this. So I then cut it out and have used it on the right side of my layout as another accent as you can see here below.


In my stash I found some gorgeous lace......this was adhered around the framework and also on sections of the inside to give it more depth. I cut the largest of the Tags from Vintage Romance's Love Notes and shortened the framework to sit my photo in. I have wrapped more of the lace around the photo to make it pop a little more.


Ok so probably another of my favourite Dusty Attic chipboard pieces to use is the Leafy Stem # 5 matched with the gorgeous Foliage #2. I wanted to keep within the moodboard colours for this but I also wanted these pieces to stand out a little more so I have gone with a chocolate colour using Ground Espresso Distress Ink and watering it down with Gesso and then spritzing with a little more water to tone it down even more. I did this for all of the leaf pieces. 


I have done some colouring of the background to help the clusters stand out a little more. I used some Gold Crackle Paste again watering it down with gesso.


I so so love using hearts and I have used these ever so gorgeously small Dusty Attic Hearts dressed in liquid pearls. The Dusty Attic chipboard title was also dressed with the liquid pearls and dry brushed with gesso.


If you keep scrolling you will find the complete materials list for this layout.
I hope I have inspired you to have a go at this month's moodboard for The Dusty Attic. Just remember to create something with a little Dusty Attic to be in the running for a $100 Dusty Attic voucher!!!
Until next time happy scrapping and take care.

Tina x

Design Team Member 2016

The Scrapbook Store


Materials Used

Maja Design - Vintage Romance - 12"x12" Double Sided Patterned Paper - Happily Ever After
Maja Design - Vintage Romance - Happily Ever After

Maja Design - Vintage Romance - 12"x12" Double Sided Patterned Paper - Champagne
Maja Design - Vintage Romance - Champagne
Maja Design - Vintage Romance - 12"x12" Double Sided Patterned Paper - Love Notes
Maja Design -Vintage Romance - Love Notes

               Image 1   

Dusty Attic Ornamental Trim #2
Dusty Attic Leafy Stem #5 DA1144
Dusty Attic Foliage #2 DA1292N
Dusty Attic Mini Hearts #2 DA0990C
Dusty Attic Word Pack #33 DA1448
Distress Ink Ground Espresso
Liquid Pearls Platinum
The Scrapbook Store Mini Lily 10 pack (baby blue)
Wild Orchid Lilies (Baby Blue and White)
Gypsophilia Ivory Flowers
Lace Trim
Finnibairs ExtraVagance Gold Crackle Texture Paste
Liquitex Gesso
Twinkling H20's - Ice
Cheescloth

Special Guest

Special Guest
2017