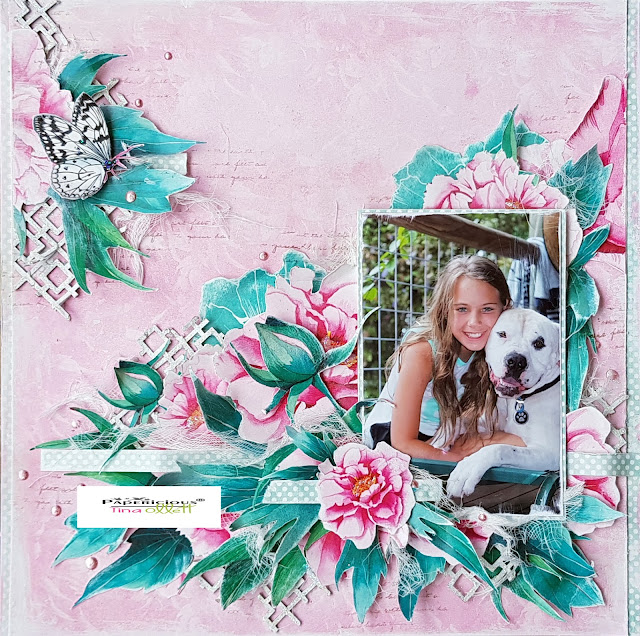
Hello and a very warm welcome to you! I am with you today to share my very first blogpost using the gorgeously stunning Papericious "Fluer Fun" collection.
When I received this collection I was taken away by the colours of it. I am not usually a brights girl but this got me to thinking about the Festive Challenge also this month. And I thought that maybe I could get a headstart with my Christmas Creating. Every Christmas I create a couple of layout projects for a relative or friend as some extra for their parcel. The grandparents always relish a layout of one of the children and in the case is it one of the children with a pet friend who we treat like one of the family. For this project I have titled it
"She loves him and he, her".....
I was truly taken aback with the sheets of florals and you guessed it, I went ahead and fussy cut a lot of the sheets to give me the base for my layout.
So along with the sheets of fabulous florals and leaves I also used the plain pink sheet as my background page. This I trimed the sides at the left and right and added a little strip of the pretty green polkadots behind each side. These pieces were sanded a little too. I love to show a bit of the white core of the papers for my projects to give them that shabbiness. So I also primed my background with Clear Gesso. And left this to dry. Once dry I did a little sponging using the Papericious Natural White Chalk Paint. This went on just beautifully with a sponge and I wiped excess away with a baby wipe at the end not to cover every part of the pattern.
I started firstly with my Portrait 4 x 6 inch colour photo of my youngest daughter and our gorgeous boy "Gru". This was matted with some of the leftover green polkadot papers. Again the edges were sanded and I also popped this up on a couple of layers of 3D foam tape.
The Pearl Pink Chalk paint was used to give some highlights to the frame work of my layout. I ran my finger over the outer edges of the layout with the Pearl Pink firstly then I went over it with a little of the Natural White.
All of the layers of the fussy cut floral and leaves were distressed a little and I also did some sanding to give the look of shabby chic again.
Here you can see some of the layers. There are quite a few. I also added in some of the fabulous Papericious Chippis. A collaged pattern that I turned on its side. So rather than looking like a square it looks like a diamond of sorts. This was dressed in the Natural White Paint Chalk. I gave it two coats and then went over it with some Star Dust Stickles to make it shimmer. I also added in some distressed pieces of white muslin to create more layers to my project.
And here you can see that I have also added in some strips of the green Polkadots. The edges were sanded and distressed and I hot glued these in place to sit over the foliage as seen above.
And from another view. You will also notice that I added in a little random stamping using a script stamp with some Walnut Distress Ink. This adds to the dimension some more and also brings out some of the browns in my daughters hair also. Above you may be able to see that I have added the Star Dust Stickles to the yellow centres of the flowers. Just addes a nice touch I think.
Well that is it. My Festive creation for this months challenge. I hope you have enjoyed my first post.
Until next time take care.
Tina x


No comments:
Post a Comment